

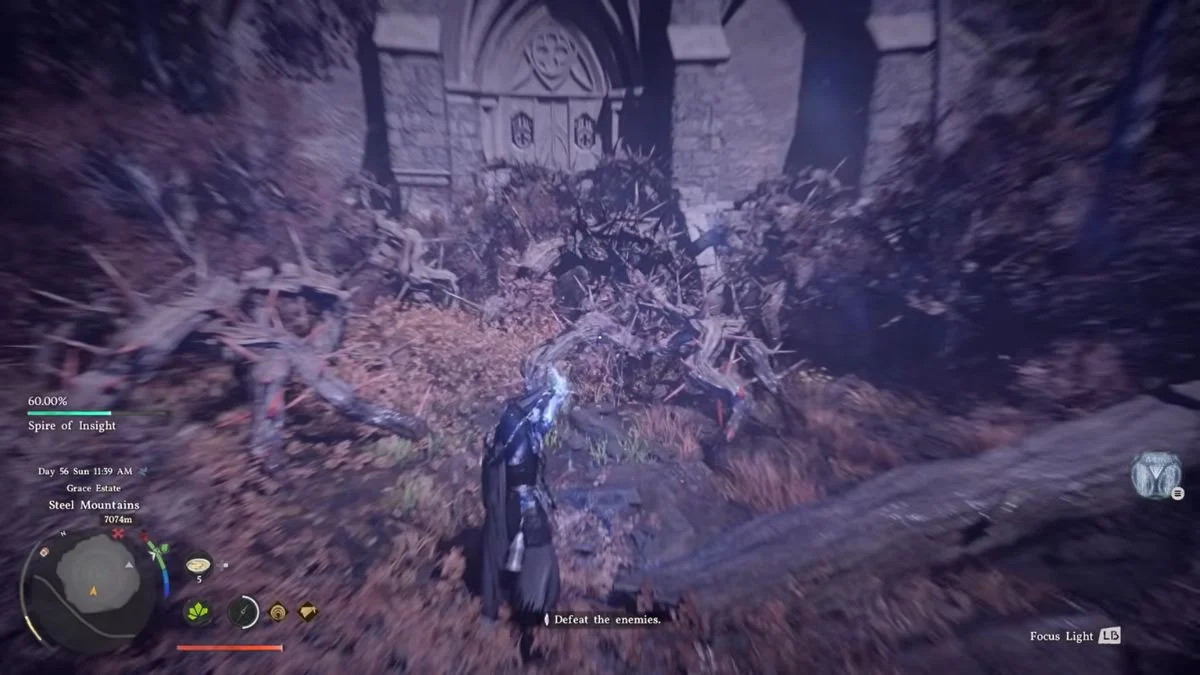
The Spire of Insight is one of Crimson Desert’s most rewarding optional towers, packed with riddles across three floors and an Abyss Gate waiting at the top.
The Spire of Insight is an optional location in Crimson Desert that sits in the Steel Mountains region, south of Hernand and past Pororin Village. You do not need to visit it for any main quest, however completing it unlocks access to the Chaos Forest Abyss puzzle and several collectible rewards worth picking up along the way. The tower itself is mostly puzzle-based with minimal combat inside, making it accessible even for early-game players. If you are standing outside scratching your head at thorny vines and cryptic riddles, this guide walks you through every step from entrance to Abyss Gate.
Spire of Insight Location

The Spire of Insight sits in the Steel Mountains subregion of Demeniss, southeast of Glenbright Manor and south of Pororin Village. On the map, look for it just northeast of the Steel Mountains text, east of the Eastern Goblin Camp and Ruined Chapel, and southwest of Willow River. The tower is tall enough to spot from a distance once you get close to the area, so simply head toward it when it comes into view. Once discovered, the Spire receives a permanent map icon that you can use for fast travel on return visits, which is useful if you need to come back for the Abyss puzzles connected to it.

Spire of Insight: Crimson Desert Overview
| Detail | Info |
| Location | Steel Mountains, Demeniss Region |
| Type | Optional Spire Challenge |
| Puzzle Floors | 3 (plus entrance riddle) |
| Reward | Access to Chaos Forest Abyss Puzzle |
| Combat Difficulty | Low inside the tower; Fundamentalist Goblins outside |
| Optional Collectibles | Ranged Weapons of the World: Bows Vol. 2, Two-Handed Weapons of the World Vol. 2, Alchemy Formula: Gold Bars |
Before You Enter: Dealing With the Goblins
When you first arrive, Fundamentalist Goblins patrol the area around the entrance. These enemies go down quickly in a direct fight, however if you would rather save time, you can crouch and use stealth to avoid them entirely. Clearing or bypassing them first makes the puzzle-solving process much more peaceful and uninterrupted.
How to Get Inside the Spire of Insight

Thick thorny vines block the entire entrance when you first arrive. You can clear these by activating your Blinding Flash: Concentrated Light ability and focusing the light directly onto the brambles to burn them away. On controller, use LB and RB together (L1 and R1 on PlayStation), then hold RB or R1 and press LB or L1 to focus the beam. On keyboard and mouse, use Ctrl and left-click, then hold Ctrl while pressing left-click to concentrate the light. Alternatively, you can find a nearby lantern or brazier, light an arrow from it, and shoot the vines for the same result.
Once the vines are cleared, you will find the entrance door with a riddle plaque and a small bowl.
Entrance Riddle: “When the bones of the earth awaken from their long silence and find their place, time begins to flow once more.”
Solution: Pick up one of the small pebbles lying on the ground near the doorstep. These are the “bones of the earth” the riddle refers to. Place the pebble into the bowl on the door and it will light up, unlocking the entrance and letting you step inside.
Floor One: The Gravestone Riddle
Once inside, check the first floor for the Ranged Weapons of the World: Bows Vol. 2 blueprint before doing anything else. After collecting it, head to the giant book on the platform in the centre of the room and read it.
Riddle: “Even after many years have passed, the traces left behind revive forgotten tales.”
Solution: Look to the right of the platform with the giant book. On a desk along the wall beneath the bookshelves, you will find a Gravestone. If you are having trouble spotting it, items in the Spire glow slightly when you move close to them, and using your focus or inspect function also helps highlight interactive objects on lower graphics settings. Pick the Gravestone up and place it inside the golden bowl in front of the book.
After placing the item, interact with the switch on the platform or simply stand on it and press the interact prompt to activate the elevator. Some players place the item and then step off immediately, which causes them to miss the lift entirely. Stay on the platform and it will carry you up to the second floor.

Floor Two: The Telescope and Pen Tip Riddle
Read the giant book on the second floor to receive the next clue.
Riddle: “Records filled with wisdom guide us to the past, while tools that look to distant places illuminate the future.”
This riddle points to two separate items that you need to find and place in the bowl.
Item 1: Telescope Turn around from the platform and head to the southwest corner of the floor, across from the bookshelf with the ladder. You will find a miniature Telescope sitting on a desk. Pick it up and bring it back to the golden bowl.
Item 2: Pen Tip From the golden bowl, face south and head toward the southeast corner where a desk sits with scrolls on it. Take a right from there and enter the small back room through the door in the wall. On the desk inside, near the window, you will find a Pen Tip. It sits in the back right corner of the desk, so move the camera around carefully if you are struggling to spot it. Using focus or the inspect function also helps highlight it clearly.
Place both the Telescope and the Pen Tip into the golden bowl, then interact with the platform switch to ride up to the third floor.
Floor Three: The Sundial, Celestial, and Small Map Rotator Riddle
Before reading the book on the third floor, grab two optional collectibles that are easy to miss:
- Alchemy Formula: Gold Bars sits taped to the edge of the head-level bookshelf directly behind the giant book, on the end of the left bookshelf next to the gap between the right bookshelf. This recipe is particularly valuable in the early game as Gold Bars are an excellent source of income and can be used for banking and investments at vendors
- Two-Handed Weapons of the World Vol. 2 blueprint is a red book found on a bottom bookshelf directly to the left of the golden bowl. Lean the camera around to spot it leaning against the side wall of the shelf
Once you have both collectibles, read the giant book.
Riddle: “The dance of the heavens, the turning of the Earth, and the march of time all point to a single truth.”
This riddle points to three items scattered across the room’s bookshelves and floor. All three glow faintly when you move close, so work your way methodically around the room if any of them prove hard to spot.

| Item | Location |
| Sundial | On the bookshelf at head level, directly behind the giant book |
| Celestial | On the floor between two bookshelves, to the right of the giant book, sitting on top of a stack of books |
| Small Map Rotator | On a bookshelf at head level, four rows to the right of where the Celestial sits |
Pick up all three items and place them into the golden bowl. Interact with the platform switch and the elevator will carry you to the top floor of the Spire of Insight.

The Top Floor: Abyss Gate and What Comes Next
At the top of the Spire of Insight, you will find an Abyss Gate. Stepping through it begins the Chaos Forest Abyss puzzle, which is noticeably more demanding than the Spire itself. The Chaos Forest involves combat, light-based puzzles, vines, power sources, and timed doors, so it is worth preparing before you step through rather than jumping in immediately after finishing the Spire.
Completing the Chaos Forest connects to several further Abyss challenges and rewards you with additional Abyss Artifacts, which you need to unlock and upgrade skills and abilities throughout Crimson Desert. Collecting as many as possible is well worth the effort as your skill upgrade costs increase significantly the further you progress.

All Items to Collect in the Spire of Insight
| Item | Floor | Type |
| Ranged Weapons of the World: Bows Vol. 2 | Floor 1 | Blueprint |
| Gravestone | Floor 1 | Puzzle Item |
| Telescope | Floor 2 | Puzzle Item |
| Pen Tip | Floor 2 | Puzzle Item |
| Alchemy Formula: Gold Bars | Floor 3 | Recipe |
| Two-Handed Weapons of the World Vol. 2 | Floor 3 | Blueprint |
| Sundial | Floor 3 | Puzzle Item |
| Celestial | Floor 3 | Puzzle Item |
| Small Map Rotator | Floor 3 | Puzzle Item |
The Spire of Insight is one of the more satisfying optional challenges in Crimson Desert once you know where each item sits. The riddles are cryptic enough to slow you down on a first visit. However, with the floor-by-floor breakdown above, you should clear the tower cleanly in a single run, collect every blueprint and recipe along the way, and step into the Chaos Forest fully prepared for what comes next.


Leave a Reply