


For anyone going deep into Mortal Shell 2, the Tarforge quickly becomes one of the most important systems to master. It isn’t just a place where you throw Coins and materials at your favorite weapon. As you explore Fallgrim, you can restore new Tarforge functions that unlock melee upgrades, sidearm enhancement, Tarstone progression, equipment smelting, and eventually the ability to push weapons beyond their normal upgrade ceiling.
The catch? The Tarforge doesn’t start fully operational. Several components are scattered across different regions, and you’ll need to recover them and bring most of them back to Franz in Marrow Keep. Some are available surprisingly early, while others are locked behind much later areas of the campaign.
I’ll walk you through the entire Tarforge progression in the order you can reasonably complete it, including every component, where to find it, what it unlocks, and how the upgrade systems work once the machine is fully restored.
Spoiler warning: This guide includes progression details from across the campaign, including the location of an item obtained shortly before the final boss.
Gearing Up Before You Grind: Before you sink Coin into the Tarforge, it helps to know which weapon actually deserves the investment, and one dual-mode pickup stands out early on. Our walkthrough of the Mortal Shell 2 Axatana Weapon Guide: Location, Forgotten Tower Route, Forms & Upgrades covers exactly where to find it.
Every Tarforge Component You Need
There are five components connected to the Tarforge’s complete functionality:
- Muradean Actuator — unlocks melee-weapon enhancement.
- Obsidian Lathe — unlocks sidearm enhancement.
- Etching Needles — unlocks Tarstone leveling and Tarcore acquisition.
- Foundry Stone — unlocks weapon and sidearm smelting.
- Endless Core — removes the normal upgrade cap for weapons and sidearms.
The first four components are taken to Franz, who operates the Tarforge in Marrow Keep. The Endless Core works differently because you install it through the Tarforge after obtaining it.
So, no, you don’t have to wait until the end of the game before you can use the Tarforge. Its systems gradually come online as you explore.
More Hidden Unlocks in Fallgrim: Component-hunting like this isn’t limited to the Tarforge, and one of the game’s earlier areas hides its own gated reward behind a similar recovery mission. Check out our Mortal Shell 2 Chapel Key Guide: How to Find the Key, Enter the Shrine of Trials, and Get the Axe & Dagger for that one.
Find the Tarforge in Marrow Keep
You’ll find the Tarforge in Marrow Keep, with Franz standing beside the machine.
When you first arrive, several of its functions are unavailable. Your job is to recover the missing components and bring them back so Franz can restore the machine.
The first one is tied to the opening section, so you can begin upgrading your equipment fairly early.
Get the Muradean Actuator in the Village Outskirts
The Muradean Actuator is the first Tarforge component you can obtain.
During the prologue, travel through the Village Outskirts until you reach its beacon. After cleansing the beacon, search the surrounding area for a chest containing the Muradean Actuator.
This is an early-game item and is easy to obtain if you properly explore the area. It can mainly be missed if you rush through the opening section without checking the relevant chest.
Once you have it, return to Franz in Marrow Keep and hand it over.
What the Muradean Actuator unlocks
The Muradean Actuator activates melee-weapon enhancement at the Tarforge.
From this point, you can spend Coins and smithing materials to improve your weapons. The required material changes depending on the weapon’s current upgrade level.
The materials used throughout the upgrade system can include:
- Ventrium
- Laterite
- Dorsalite
- Thoracium
- Ossinite
Early upgrades can require Ventrium, while later levels can demand increasingly rare materials such as Laterite, Dorsalite, Thoracium, and Ossinite.
That makes resource management important. You don’t necessarily want to burn every rare smithing material the second you find it, especially while you’re still testing different weapons.
Which weapons should you upgrade?
The Tarforge lets you invest heavily into individual weapons, so focusing your resources on weapons you actually enjoy using is generally more efficient than spreading everything evenly.
A weapon you understand and feel comfortable with can be much more valuable than several weapons sitting at similar upgrade levels.
The Axatana, for example, can benefit significantly from upgrades because its dual-mode moveset lets it fulfill different combat roles.
Ranking Your Options: Deciding where to invest your materials gets a lot easier once you know how your options actually stack up against each other, and the same logic applies to picking a Shell. Our Mortal Shell 2 Shells Tier List: Best Shells Ranked From S-Tier to B-Tier ranks every option from top to bottom.
Find the Obsidian Lathe in Martyr’s Tomb
The next major component is the Obsidian Lathe.
Head into Fainweald and locate the Widow’s Overlook Beacon. From there, travel south toward Martyr’s Tomb.
The dungeon is close to the grave associated with the Tiel shell, making that grave a useful navigation landmark.
Enter Martyr’s Tomb and progress through the dungeon until you reach the area containing the Obsidian Lathe. There’s additional loot in the surrounding room, including a Tarstone, so it’s worth searching instead of grabbing the component and immediately running away.
If you later encounter the sealed gate and need to escape the room, look above it. You’ll find a mechanism that you can shoot to open the gate.
Take the Obsidian Lathe back to Franz.
What the Obsidian Lathe unlocks
The Obsidian Lathe adds sidearm enhancement to the Tarforge.
It works on the same general upgrade principle as melee weapons, but now your ranged or sidearm equipment can also be improved.
This matters if your build depends on a sidearm for opening attacks, ranged pressure, or finishing enemies from a distance. Instead of letting your sidearm remain stuck at its initial strength, you can develop it alongside your main weapon.
Loadouts Beyond Mortal Shell 2: Building around a strong sidearm changes how a whole encounter plays out, and class choice does the same job in other combat-heavy titles. Our Mistfall Hunter Class Tier List: Best Classes Ranked for the Launch Meta (All 6 Classes Ranked) breaks down which picks give you that kind of flexibility.
Find the Etching Needles in the Glutted Mire
The Etching Needles are one of the most important Tarforge components if you’re interested in Tarstones.
They’re found in the Glutted Mire, inside the Corrupted Gate dungeon in the southeastern part of Fainweald.
The item is positioned shortly before one of the area’s major encounters, meaning you don’t have to clear the entire dungeon before obtaining it.
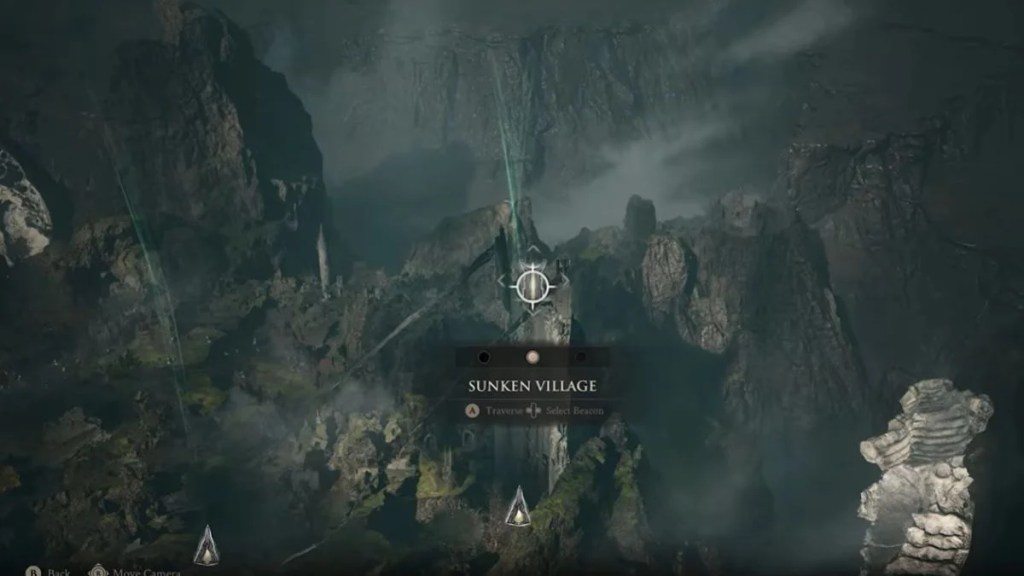
Reach the Sunken Village Beacon
Progress through the Glutted Mire until you reach the Sunken Village Beacon.
From there, cross the rope bridge. You’ll encounter the Tarblighted Shepherd and its troublesome sheep.
Defeat the boss and clear the surrounding enemies so you can safely continue.
Afterward, look for a gap in the wooden boards. Squeeze through it and keep moving.
Find Ruk and the Etching Needles
After passing through the wooden boards, you’ll encounter Ruk.
Ruk is an important landmark because he warns you about the major boss encounter ahead. But don’t immediately rush toward that boss.

Instead, search the area just beyond Ruk.
There’s a chest containing the Etching Needles.
Grab them and return to Franz in Marrow Keep.

This component is especially valuable during the middle portion of the game because it doesn’t merely add another piece of equipment to upgrade. It opens an entirely separate progression system.
NPC Hints Worth Following: Ruk’s warning before the boss fight is a small detail, but paying attention to NPC cues like that can unlock entire secret paths in other games too. Our Mortal Shell 2 Baghead Quest Guide: How to Complete the Nothing Test and Secret Ending walks through one of the trickier hidden routes in the game.
Unlock Tarstone Leveling
Once Franz has the Etching Needles, the Tarforge gains Tarstone leveling.
Tarstones work differently from normal weapon upgrades. You don’t simply spend materials to increase their level.
Instead, Tarstones gain experience through combat.
The key detail is that the Tarstone must be equipped in a compatible weapon or sidearm. Merely owning a Tarstone does not generate XP.
How Tarstone XP works
Equip the Tarstone you want to develop and keep playing normally. Enemies you kill contribute XP to the equipped Tarstone.
The first major threshold is:
10,000 / 10,000 XP
Once the Tarstone reaches that amount, return to the Tarforge.
You can then spend 100 Coins to raise the Tarstone to Level 2.
That first upgrade also gives you one Tarcore.
And that Tarcore becomes extremely important for higher Tarstone progression.
Tarcore Farming Explained
After reaching Level 2, continue using the Tarstone until it reaches:
20,000 / 20,000 XP
At that point, you can advance it further by spending six Tarcores.
This creates a different kind of progression loop. You aren’t necessarily supposed to pick one favorite Tarstone and ignore every other option.
Instead, less-important Tarstones can become useful sources of Tarcores.
A Tarstone you don’t particularly care about can still be worth equipping long enough to reach its first upgrade threshold. Once it reaches Level 2, you receive a Tarcore that can be used to improve the Tarstones you actually want to push further.
In other words, the system rewards breadth of progression before specialization.
Understanding Tarstone Levels
Tarstones can reach up to four levels.
Their effects become stronger as they level, and some Tarstones can actually change how their effects work at higher levels rather than simply receiving a bigger numerical bonus.
Depending on the Tarstone, upgrades can:
- Increase the number of affected attacks.
- Increase damage.
- Increase effect duration.
- Improve healing or Leech rewards.
- Reduce Resolve costs.
- Turn temporary effects into permanent ones.
That final point can be especially significant because a Tarstone may eventually change how your build functions rather than simply making one ability slightly stronger.
However, Tarstones have equipment compatibility restrictions. Before spending large amounts of Tarcore, think about the weapon or sidearm you’re building around.
Branching Progression Elsewhere: The idea of leveling up multiple paths before committing truko one shows up outside the Tarforge too, especially in games built around multiple distinct outcomes. Our Splatoon Raiders All Endings Explained: How to Unlock Every Ending (Good, Bad, Secret & Post-Credits) maps out that kind of branching structure in full.
Smelting, the Endless Core, and the Complete Tarforge
Find the Foundry Stone at the Outskirts of Mammon Beacon
The Foundry Stone unlocks the Tarforge’s smelting system.
Travel to the Outskirts of Mammon Beacon.
After arriving, look toward the blasted area near the gateway. A chest containing the Foundry Stone is located there.
But this chest isn’t exactly sitting in a peaceful little corner waiting for you. A large group of enemies, including numerous knights and soldiers, guards the area.
You can fight through them and clear the route, or, if you only care about restoring the Tarforge, focus on reaching the chest and grabbing the component.
Collect the Foundry Stone and return to Franz.
What Smelting Does
Once the Foundry Stone is installed, the Tarforge gains its smelting function.
Think of smelting as the reverse of weapon enhancement.
Instead of putting more resources into a weapon, you can return an upgraded weapon to an unleveled state.
The big advantage is that the resources invested in that weapon are refunded.
This makes experimentation much less punishing.
Maybe you spent heavily on a weapon because it was carrying you through the early game. Later, you discover another weapon that fits your build much better.
Normally, that earlier investment could feel wasted.
With smelting, you can return the original weapon to its unleveled state and recover the resources you invested in it.
That gives you much more freedom to experiment with different weapons and builds.
Reclaiming Resources in Other Games: Getting a full refund on a build you’ve outgrown is a rare mercy, and other games have their own systems for not wasting your collection. Our How Many Pals Are in Palworld After the 1.0 Update? breaks down just how much there is to manage once you’ve built out a full roster.
The Endless Core Is Your Final Tarforge Upgrade
The final component is the Endless Core.
Unlike the first four components, this is not something you’ll pick up during the early or middle sections of the campaign.
The Endless Core is tied to the game’s final major dungeon, the Unfound Path.
So this is very much a late-game Tarforge objective. You shouldn’t expect to have it available for most of your first playthrough.
Reach the Hidden Nave in the Unfound Path
Once you unlock the Unfound Path, progress through the dungeon normally.
Continue until you clear the corrupted tendrils blocking your route.
After dealing with them, you’ll gain access to the Hidden Nave Beacon.
The Hidden Nave sits in the central part of the area immediately before the final boss section.
Activate the beacon so you have a convenient return point.
But don’t assume the Endless Core is simply sitting along the obvious route to the boss. You need to complete a small environmental sequence in the Hidden Nave.
Find the First and Second Bonfires
Inside the Hidden Nave, locate the first bonfire.
From there, run through the tunnel toward the opposite side.
Eventually, you’ll reach a second bonfire.
Here’s where things get interesting.
Don’t simply continue deeper into the dungeon.
Instead, return to the first bonfire.
A torch that wasn’t there previously should now have appeared.
Pick up this torch.
Doing so changes the route and gives you access to an otherwise inaccessible section.
Enter the Hidden Area
With the torch in your possession, move forward into the fog.
The fog reveals a different area that wasn’t accessible during your initial journey through the section.
Follow the newly revealed path.
The route slopes downward, so keep following it until you reach the bottom.
There are several chests along the route containing Gloom and other resources.
However, there’s an important interaction you should complete before casually looting everything around you.
Deal With the Gloom Doorway
When you reach the relevant doorway, interact with it before spending time opening all the nearby resource chests.
You’ll be asked to offer all of the Gloom you currently possess.
Make the offering.
After that interaction is complete, you can return to the surrounding chests and collect the resources without worrying about accidentally spending the Gloom you intended to use for the doorway.
Continue toward the bottom of the area.
The chest waiting there contains the Endless Core.
Install the Endless Core
The Endless Core works differently from the other Tarforge components.
You don’t simply hand it to Franz.
Instead, return to the Tarforge in Marrow Keep, open the Tarforge menu, and use the appropriate installation option to install the Endless Core.
Once installed, you’ve completed the Tarforge’s final major upgrade.
What the Endless Core does
The Endless Core removes the normal level cap on weapon and sidearm upgrades.
This is the final stage of Tarforge progression and is primarily useful for late-game optimization and highly developed builds.
Until you install it, your weapons and sidearms remain restricted by their normal upgrade ceiling.
Recruiting for the Long Game: Late-game systems like the Endless Core reward players who plan ahead, and the same forward-thinking pays off when building out a party elsewhere. Our Echoes Of Aincrad Partner Guide: Every Companion, Their Skills, and Exactly How to Recruit Them covers every recruitable ally in that game.
How Every Tarforge Function Fits Together
Once all five components have been installed or activated, the Tarforge becomes the central workshop for your equipment.
Melee weapons — Muradean Actuator
The Muradean Actuator unlocks melee enhancement.
You spend Coins and the required smithing materials to increase weapon levels. Depending on the upgrade level, those materials can include Ventrium, Laterite, Dorsalite, Thoracium, and Ossinite.
Sidearms — Obsidian Lathe
The Obsidian Lathe unlocks sidearm enhancement.
It allows your ranged equipment to be upgraded using the same general resource-based progression philosophy as melee weapons.
Tarstones — Etching Needles
The Etching Needles unlock Tarstone progression.
Tarstones gain XP from kills while equipped in a compatible weapon or sidearm. At 10,000 XP, you can spend 100 Coins to raise the Tarstone to Level 2 and receive one Tarcore.
Continuing to 20,000 XP allows further progression by spending six Tarcores.
Tarstones can reach four levels.
Smelting — Foundry Stone
The Foundry Stone unlocks smelting.
You can return an upgraded weapon or sidearm to its unleveled state and recover the resources invested in it.
No normal upgrade ceiling — Endless Core
The Endless Core is the final component.
It removes the normal upgrade cap for weapons and sidearms, opening the door to late-game optimization beyond the standard ceiling.
Scale Matters in Big Games: A system with this many interlocking parts gives you a sense of just how much Mortal Shell 2 packs into one campaign, and scale is exactly what makes players curious about other massive RPGs too. Our How Many Floors Does Echoes of Aincrad Actually Have? tackles that same kind of scope question.
Tarstone Progression: The Smart Way to Build Your Collection
Tarstones deserve extra attention because they don’t follow the normal Tarforge upgrade model.
You don’t simply find a Tarstone, walk up to Franz, pay for an upgrade, and call it done.
Instead, you equip a compatible Tarstone and earn XP through combat.
For example, if you discover a Tarstone you want to use, equip it in a compatible weapon or sidearm and start defeating enemies.
Once it reaches 10,000 XP, return to the Tarforge and spend 100 Coins to upgrade it.
That first upgrade provides one Tarcore.
You can then keep leveling Tarstones and collecting Tarcores. Those Tarcores can eventually be spent on the higher-level upgrades of the Tarstones that matter most to your build.
That’s why focusing exclusively on one Tarstone from the beginning can be inefficient.
A Tarstone you consider mediocre can still contribute to your progression by providing a Tarcore after you take it through its early upgrade threshold.
Counter-Picking Your Build: Knowing which Tarstones are worth grinding is a lot like knowing which counters to bring into a tough matchup. Our Pokémon GO Arlo Counters and Lineup (July 2026): How to Beat the Team GO Rocket Leader applies that same build-optimization mindset to a Team GO Rocket showdown.
What Higher-Level Tarstones Can Actually Do
Tarstone upgrades can change how your build plays rather than simply adding tiny statistical improvements.
Auspicious Stone and Deadman’s Stone improve melee critical chance, with later levels providing increasingly larger bonuses.
Shattering Stone increases melee stagger damage, making it useful for builds built around repeatedly staggering enemies.
For ranged setups, Marksman’s Stone improves ranged critical chance, while Siegebreaker’s Stone increases ranged stagger damage.
Other Tarstones have more unusual effects.
Parasitic Stone rewards kills with Leech, with higher levels increasing the number of Leech stacks gained.
Grudge Stone provides increasingly frequent guaranteed critical hits as it is upgraded.
Duality Stone changes compatible light attacks so they can strike twice. Higher levels extend the effect to more attacks within the combo.
Infusion Tarstones can become especially powerful at higher levels.
Arbiter’s Prize lets a weapon become infused with Bloodcurse after spending Resolve. Its progression increases the number of affected attacks and can eventually make the infusion permanent.
Emberseed Stone can provide a Burn infusion for compatible sidearms. Higher levels extend the duration and can eventually make the effect permanent.
Ability Tarstones work differently again. They consume Resolve to add special attacks or modify existing attacks.
Acolyte’s Stone, for example, enhances a charged Light Attack and improves its benefits as it levels.
So, yeah, Tarstones can become much more than passive bonuses. At higher levels, they can fundamentally influence how an entire build behaves.
When Tech Trouble Gets in the Way: Chasing down every infusion and effect variant is hard enough without your game crashing mid-run. Our fix list in Mistfall Hunter Fatal Error: 9 Fixes to Stop the “UE-MistfallHunter Game Has Crashed” Error tackles a different kind of frustration players run into.
When Should You Upgrade the Tarforge?
You don’t need every Tarforge function immediately.
Your first priority should naturally be the Muradean Actuator, because it gives you access to ordinary melee-weapon enhancement.
The Obsidian Lathe becomes important once you start relying heavily on a particular sidearm.
The Etching Needles are worth pursuing as soon as practical if you want to build around Tarstones. Tarstone XP accumulates through combat, so obtaining the system earlier gives you more time to earn XP and collect Tarcores during the rest of the game.
The Foundry Stone is less about making your equipment directly stronger and more about giving you flexibility. Because smelting refunds your invested resources, experimenting with different weapons becomes much safer.
The Endless Core is naturally a late-game objective because its location is tied to the final major section of the campaign.
Timing Your Priorities: Sequencing your upgrades well saves you a lot of wasted effort, and the same goes for knowing when a mount or unlock is actually worth chasing. Our Palworld 1.0 Fastest Flying Mounts: Every top speed option and when you can actually get one breaks down exactly that kind of priority call.
The Tarforge Is More Than a Weapon Upgrade Station
The biggest thing to understand is that the Tarforge is a progressively unlocked equipment system, not a single upgrade menu with one simple progression path.
First, the Muradean Actuator lets you strengthen melee weapons.
Then the Obsidian Lathe brings sidearms into the upgrade system.
The Etching Needles introduce the separate Tarstone XP and Tarcore progression system.
The Foundry Stone gives you the freedom to recover your investment from equipment you no longer want to use.
Finally, the Endless Core removes the normal upgrade ceiling for weapons and sidearms.
That progression lets you start improving your gear relatively early while saving the more advanced customization and optimization options for increasingly dangerous parts of Fallgrim.
Once the final component is installed, the Tarforge becomes your complete equipment-management hub: enhance your weapons, upgrade your sidearms, level your Tarstones, recover resources through smelting, and push your equipment beyond the normal upgrade cap.
Image Credit: Sofa Supastar Gaming (YouTube) / Cold Symmetry


Leave a Reply