

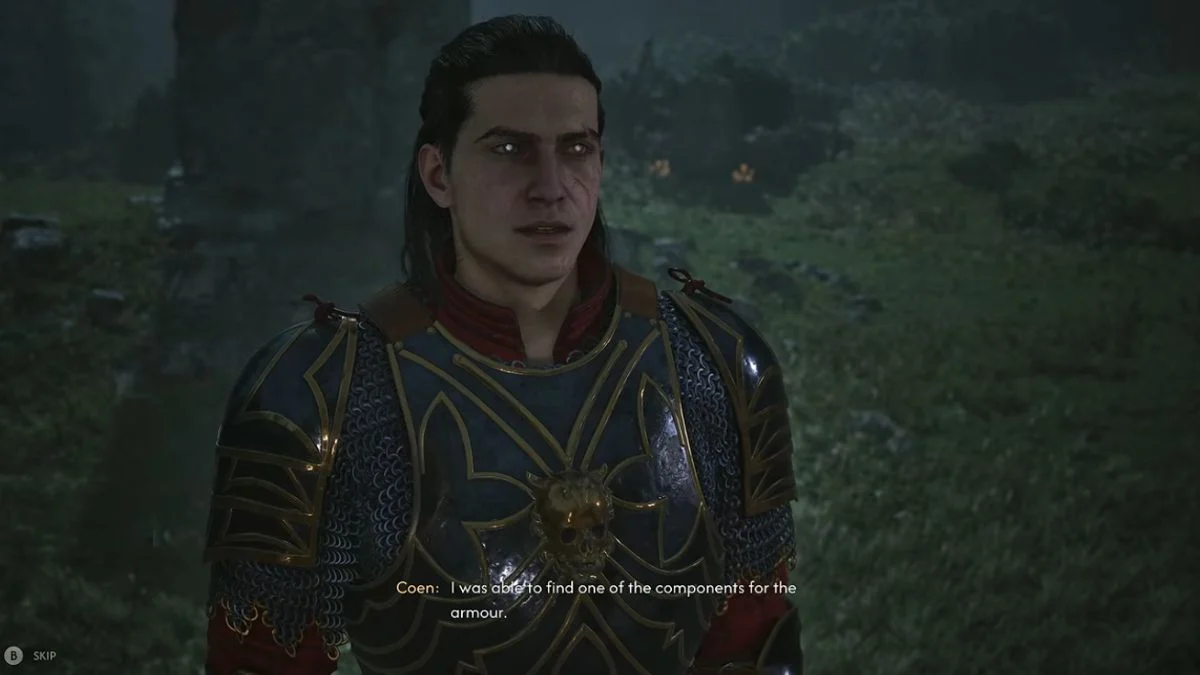
A complete walkthrough for finding every Arbiter armor component, locating Nareh at the Uriashi Hermitage, surviving the final ritual, and unlocking all four Enhanced Arbiter armor pieces.
Looking for some seriously powerful heavy armor in The Blood of Dawnwalker? Then A Bulwark Against Darkness deserves a spot near the top of your side-quest list.
This quest sends Coen across Vale Sangora hunting down four rare crafting components. Bring everything to the right blacksmith, survive one nasty final ritual, and you walk away with the complete Enhanced Arbiter armor set—covering your chest, legs, bracers, and boots.
The catch? You can’t simply start the quest whenever you want.
You first need to reach Infamy Level 4, also known as the Notorious tier. From there, a mysterious letter can enter your progression and point you toward the materials and the Uriashi blacksmith capable of forging the armor.
So, let’s break down exactly how to complete A Bulwark Against Darkness, where to find every component, and how to survive the final fight.
More Punishing Loot Hunts: A soulslike-roguelike packing angel powers, heavy metal bosses and serious build value. For more, check out our review: Crimson Moon Review: A Brutal Soulslike-Roguelike With Angel Powers, Heavy Metal Bosses and Serious Value.
How to Start A Bulwark Against Darkness
Your first major requirement is reaching Infamy Level 4, or the Notorious tier.
Infamy increases as you interfere with the Vampire Court’s operations and complete activities that attract the attention of Brencis.
Once you hit the required level, A Bulwark Against Darkness can become available through a mysterious letter.
The exact timing of the letter can vary during a playthrough. Anca can also play a role in directing Coen toward the information, while other circumstances can result in a messenger delivering the letter.
When you receive it, open the letter in your inventory and read the attached List of Armour Components.

That’s your shopping list for the Arbiter set:
- Large Lizard’s Moult
- Flask of Quicksilver
- Silk Threads
- Relic of a Saint
The letter also gives you information about the Uriashi blacksmith, who you’ll eventually need to visit to forge the armor.
And here’s a useful heads-up: you can collect the required materials before or after formally receiving the quest. So, if you’ve already explored parts of Vale Sangora, you may have some of the work done already.
Playing A Massive Series In Order: A full breakdown of the timeline and the best sequence to play before the next big entry. For more, check out our guide: Kingdom Hearts Games in Order: The Complete Timeline and Best Play Order Before Kingdom Hearts IV.
All Arbiter Armor Materials and Locations
The four required components are spread across different parts of Vale Sangora, and several are connected to other quests.
| Material | Location / Source |
| Large Lizard’s Moult | Cave between the Briar Sloughs and Maragir Wealds |
| Flask of Quicksilver | Aurelius’ Tower after completing the relevant section of Home Sweet Home |
| Silk Threads | Free reward during Come Hither or purchased from the Sanzhani merchant |
| Relic of a Saint | Several saint relics can satisfy the requirement |
Here’s exactly how to get each one.
Large Lizard’s Moult Location
The Large Lizard’s Moult is hiding inside a cave in the marshy region around the Briar Sloughs and Maragir Wealds.
One reliable route is to travel toward the Muddy Trail Shrine, then head east toward the nearby cave. You can also approach the location through the surrounding marshlands.
The entrance can be surprisingly easy to miss, so keep an eye out for the rocky opening and the slime trails around the area.
Once you’re inside, push toward the back of the cave. The Large Lizard’s Moult can be picked up from the ground.
The location may look familiar if you’ve already completed the Gilded Gauntlet/Bittersweet Toast storyline. It’s close to an area connected to Iulian’s ritual and Vera’s earlier activities.
Building Out Your Roster: Everything you need to know about capturing, using and growing your collection of powerful creatures. For more, check out our guide: Once Human Deviations Guide: How to Capture, Use and Build the Ultimate Deviant Roster.
Quick tip
Don’t wait for the quest marker to drag you here.
You can discover the cave while freely exploring Vale Sangora, grab the moult, and simply keep it in your inventory until you’re ready to complete the armor quest.
One less item to hunt down later. Nice.
Flask of Quicksilver Location
Next up is the Flask of Quicksilver, which is found inside Aurelius’ Tower.
This one is tied to the Home Sweet Home quest and its time-loop sequence, so don’t expect to walk into the tower and immediately pick it up.
Progress through Home Sweet Home and deal with the events surrounding the astrologer. You’ll also need to resolve the nightmare/time-loop sequence and the relevant tower events.
Once the sequence has been resolved and the tower’s enemies have been dealt with, return to the upper section of the tower.
The Flask of Quicksilver can then be found in the room near the top, sitting on a desk/table.
Important
Can’t reach the flask yet?
Don’t assume you’ve missed it.
Continue progressing through Home Sweet Home. The quest progression is what allows you to properly access the location where the Flask of Quicksilver can be collected.
Cracking A Tricky Door Puzzle: A step-by-step walkthrough for opening both doors and claiming what’s behind them. For more, check out our guide: Resonance: A Plague Tale Legacy Black Temple Door Puzzle Guide: How to Open Both Doors in Chapter 7.
Silk Threads Location
The Silk Threads are a little more flexible because you have two ways to obtain the required material.
Option 1: Get Silk Threads for Free
For most players, this is the better route.
Obtain the Silk Threads through the Come Hither quest, which is part of the wider Sanzhani content.
Follow the quest into the relevant cave area and deal with the Murohn inside.
After defeating the creature, search the area and collect the Silk Threads.
The big advantage? You don’t have to spend thousands of Denarii on them.
Option 2: Buy the Silk Threads
You can also purchase the Silk Threads through the Sanzhani merchant route.
First progress through the related Sanzhani content, including:
- Good Home
- Letters to Lunka
- Pearly and Precious
Once the merchant’s shop becomes available, the Silk Threads can be purchased for roughly 6,000 Denarii, depending on the circumstances of your playthrough.
Which Silk Threads route is better?
The answer is pretty simple:
Get them through Come Hither for free whenever possible.
There’s little reason to burn a large chunk of your currency on the material when the alternative route lets you obtain it without paying the merchant.
Relic of a Saint Location
The final component is a Relic of a Saint.
The good news is that this requirement is flexible. Several saint-related relics can satisfy the requirement, so you don’t need one specific relic.
One useful source is Anca’s Echoes of Silenced Bells quest, which takes Coen to St. Tyna’s Convent.
Possible qualifying relics include:
- Saint’s Tibia
- Relic of St. Tyna
- Relic of St. Tobias
- Relic of St. Dasius
So don’t panic if you don’t have one particular saint relic in your inventory.
Tracking down scattered collectibles across a sprawling map is a genre staple, and one classic does it especially well. Every Collectible, Mapped Out: A full location guide for tracking down all eight of one Metal Gear classic’s key items. For more, check out our guide: MGS4 Chaff Grenade Locations: Where to Find All 8 Chaff Grenades in Metal Gear Solid 4.
Which Relic of a Saint should you use?
This is where you want to think before handing anything over.
If you’ve collected several qualifying relics, use the one that has the least value to your build.
For example, the Relic of St. Tyna can be more valuable as an amulet than some of the other choices. A legendary relic such as the Relic of St. Dasius is also generally worth keeping when you have another valid relic available.
A lower-value option such as the Saint’s Tibia, or another suitable lesser relic, is therefore preferable when available.
Important warning
Check your inventory before handing over a relic.
You only need one qualifying relic for the Arbiter armor. There is no reason to sacrifice a powerful amulet when another valid option is available.
Where to Find the Uriashi Blacksmith
Once you’ve collected all four components, it’s finally time to find the person who can turn this weird collection of monster parts, silk, quicksilver, and saintly relics into something actually useful.
The Uriashi blacksmith is located at the Uriashi Hermitage in the northwestern part of the map.
The blacksmith is Nareh, and she is also associated with the Forge It Anew questline.
So, if you’ve already interacted with her during that questline, the location may already be familiar.
Travel to the Uriashi Hermitage and speak with Nareh once you have everything you need.
Before starting the crafting sequence, make sure you have:
- Large Lizard’s Moult
- Flask of Quicksilver
- Silk Threads
- Relic of a Saint
Hand over the components, and Nareh begins creating the Arbiter armor.
But don’t celebrate yet.
The armor isn’t fully enhanced at this point.
You’ve still got one very important fight ahead.
Free Rewards Without The Grind: The latest active codes for extra resources, crates and more, all at no cost. For more, check out our guide: Once Human Redeem Codes: Active Codes for Free Starchrom, Deviations, Crates and More.
How to Complete the Arbiter Armor Ritual
The final stage of A Bulwark Against Darkness is where the quest stops being a simple scavenger hunt and turns into a proper survival encounter.
Nareh begins the process of creating the armor, but Coen has to survive a dangerous ritual while the work is being completed.
According to the quest walkthrough information, the ritual costs 3 Time Segments.
Once the ritual starts, enemies attack the area.
The encounter begins with a group of wolves.
Then things get much worse.
A far more dangerous bear-like apparition appears as the final threat.
Your objective is simple:
Defeat every enemy and survive the ritual.
Don’t assume the quest is finished just because Nareh has started crafting the equipment. The armor reaches its enhanced form only after the final combat sequence has been cleared.
Once the enemies are defeated, the ritual concludes and Coen receives the completed Enhanced Arbiter armor set.
And yes—you get the whole thing.
A Specific Answer, No Guesswork: The exact passcode needed to crack a lockbox and finish this quest. For more, check out our guide: Once Human Boy Just Wanna Have Fun Quest Guide: High Banks Passcode Is 325 and Here’s How to Open the Lockbox.
All Four Enhanced Arbiter Armor Pieces
Completing A Bulwark Against Darkness rewards the complete four-piece set.
That means you’re getting armor for the chest, legs, bracers, and boots rather than having to hunt down each piece separately.
Here’s what each piece brings to the table.
Enhanced Armour of the Arbiter
Slot: Heavy chestpiece
The chest armor is especially useful for hybrid builds because its bonuses improve several offensive aspects of Coen’s combat kit.
Its effects include bonuses connected to:
- Weapon damage
- Claw damage
- Witchcraft ability damage
- Focus/activation charge restoration
So, whether you’re leaning harder into weapons, claws, or Witchcraft, this chestpiece has something useful going on.

Enhanced Shin Guards of the Arbiter
Slot: Heavy trousers
The shin guards focus heavily on ability and defensive-resource regeneration.
Their effects include:
- Witchcraft ability cooldown reduction
- Passive activation-charge restoration
- Activation-charge restoration from actions
- Activation-charge restoration from perfect blocks
This makes the piece particularly useful for builds that want to keep their abilities and activation resources flowing during combat.
Enhanced Bracers of the Arbiter
Slot: Heavy bracers
These are the pieces to pay attention to if you’re making serious use of Coen’s vampiric side.
Their bonuses include:
- Increased vampiric health
- Vampiric health regeneration
- Improved blood-drinking restoration
- Increased weapon/melee damage
So the bracers aren’t just about surviving—they also help reinforce Coen’s offensive potential.
Progressing Through A Multi-Step Quest: Everything you need to gather the right components and push a tricky quest forward. For more, check out our guide: Roblox Fisch: How to Get 5 Battery Casings, Enter the Mine Shaft, and Progress Vega’s Quest.
Enhanced Boots of the Arbiter
Slot: Heavy boots
The boots round out the set with a combination of survivability and mobility-related benefits.
Their effects include:
- Increased human health
- Human health restoration
- Increased maximum stamina
- Increased magical damage resistance
Together with the other pieces, they help make the Arbiter set a flexible heavy armor option for Coen’s mixed combat mechanics.
A Bulwark Against Darkness Reward
Once the final ritual is complete, A Bulwark Against Darkness is finished.
Coen receives all four Enhanced Arbiter armor pieces:
- Enhanced Armour of the Arbiter
- Enhanced Shin Guards of the Arbiter
- Enhanced Bracers of the Arbiter
- Enhanced Boots of the Arbiter
You also unlock the “Arbiter’s Regalia” achievement/trophy for completing the set.
That’s a pretty huge payoff for one side quest.
Instead of walking away with one useful piece of gear, you’re effectively getting an entire legendary heavy armor loadout covering all four major armor slots.
Best Order to Collect the Arbiter Materials
Want to cut down on unnecessary running around Vale Sangora? Here’s a clean order to follow:
- Reach Infamy Level 4.
- Receive the mysterious letter.
- Open it and read the List of Armour Components.
- Obtain a suitable Relic of a Saint.
- Head toward the Briar Sloughs/Maragir Wealds area and collect the Large Lizard’s Moult.
- Complete the required portion of Home Sweet Home and collect the Flask of Quicksilver from Aurelius’ Tower.
- Complete Come Hither to obtain the Silk Threads for free, provided you haven’t already obtained them.
- Travel to the Uriashi Hermitage.
- Give Nareh all four components.
- Spend the required Time Segments to begin the ritual.
- Defeat the wolves and the final bear apparition.
- Collect the four Enhanced Arbiter armor pieces.
- Claim the “Arbiter’s Regalia” achievement/trophy.
This route keeps the objective straightforward while letting you knock out related quest content along the way.
What to Do After Getting the Arbiter Armor
Getting the Arbiter set doesn’t mean your high-end gear hunt has to end.
Once A Bulwark Against Darkness is complete, another major equipment objective worth pursuing is the Sword of St. Mihai, which is tied to the Forge It Anew questline.
And there’s a convenient connection here: the same Uriashi blacksmith is important to that progression.
So, if you’re already working with Nareh, completing both objectives around the same stage of the game makes sense.
For players building a high-end loadout, the combination of the legendary Arbiter armor and the Sword of St. Mihai can give Coen a powerful mix of defensive and offensive equipment.
A Boss Fight That Breaks The Rules: How to survive one of gaming’s most disorienting encounters. For more, check out our guide: Screaming Mantis Boss Guide: How to Beat MGS4’s Most Mind-Bending Battle.
Final Tips for A Bulwark Against Darkness
Before heading into the quest, keep these points in mind:
- Reach Infamy Level 4 if the Arbiter quest hasn’t appeared.
- Don’t sell the four required crafting materials before completing the quest.
- Get the Silk Threads through Come Hither for free rather than spending roughly 6,000 Denarii whenever possible.
- Keep lower-value saint relics for the crafting requirement and avoid sacrificing a powerful amulet unnecessarily.
- Complete Home Sweet Home before trying to obtain the Flask of Quicksilver.
- The Large Lizard’s Moult is located in a cave around the Briar Sloughs/Maragir Wealds area.
- Make sure all four components are in your inventory before visiting Nareh.
- The armor does not become fully enhanced until you complete the final ritual battle.
- The ritual costs 3 Time Segments according to the quest walkthrough information.
- Be ready to fight wolves followed by the bear-like apparition during the ritual.
- Completing the quest awards all four Enhanced Arbiter pieces.
- You also unlock the “Arbiter’s Regalia” achievement/trophy.
Final Verdict: Is A Bulwark Against Darkness Worth Completing?
Absolutely.
A Bulwark Against Darkness is one of the most rewarding equipment-focused side quests in The Blood of Dawnwalker because it takes Coen on a full gear hunt across Vale Sangora and ends with an entire legendary heavy armor set.
You’ll need to raise your Infamy, track down four unusual materials, navigate related quest content, find the Uriashi blacksmith, and survive the final ritual.
But the payoff is substantial.
You get the Enhanced Armour of the Arbiter, Enhanced Shin Guards of the Arbiter, Enhanced Bracers of the Arbiter, and Enhanced Boots of the Arbiter, giving Coen a complete heavy armor setup designed around the game’s human, vampiric, weapon, and Witchcraft combat systems.
Just remember the golden rule: don’t rush the hand-in.
Check your inventory first, choose a suitable saint relic, grab the free Silk Threads through Come Hither when possible, make sure the Quicksilver is available after progressing through Home Sweet Home, and arrive at Nareh’s forge with all four components ready.
Then survive the ritual.
Once those wolves and that bear-like apparition are down, the Enhanced Arbiter set is yours—and Coen is ready to make life considerably more miserable for anything standing between him and Brencis.
Featured Image Credit: Rebel Wolves / Bandai Namco Entertainment / Dan Allen Gaming via YouTube
Image 2 Credit: Rebel Wolves / Bandai Namco Entertainment / Dan Allen Gaming via YouTube
Image 3 Credit: Rebel Wolves / Bandai Namco Entertainment / Dan Allen Gaming via YouTube


Leave a Reply