


Mortal Shell 2 wastes absolutely no time reminding you that choosing the right Shell can completely change how combat feels. There are eight permanent Shells in the game, and every one of them brings a different mix of damage, survivability, abilities, and combat tricks to the table. Pick one that matches your playstyle and suddenly a brutal encounter can feel manageable. Pick one that doesn’t, and you may find yourself questioning every decision you made five minutes earlier.
So, which Shells are actually worth your hard-earned Glimpse? There is no official tier list from Cold Symmetry, meaning these rankings are based on early launch-period testing, community opinions, and available gaming guides. The meta is still developing, and a Shell’s performance can change significantly depending on upgrades, weapons, Tarstones, Seals, and, of course, how well you play it.
For now, Genessa, Smert, and Gragu stand out as some of the strongest options. But that does not mean the rest of the roster should be ignored. From Lazlo’s defensive power to Tiel’s stealthy critical attacks, every permanent Shell has a reason to exist.
Loadout Lab: Ranking the best kit for the job isn’t unique to Mortal Shell 2’s Shells. For more, check out our breakdown of Nioh 3’s weapons tier list, ranking the best samurai and ninja gear.
S-Tier Shells: These Shells Can Get Seriously Ridiculous
Genessa, the Wayward
Genessa is arguably the most flexible Shell in the current Mortal Shell 2 meta, and her biggest advantage is that she can make enemies deal with more than one threat at once.

Her Faithful Doubles can attack enemies independently, allowing you to keep pressure on a target without constantly standing directly in harm’s way. Once you have enough Resolve, abilities such as Affinity and Impetus can push the damage from those attacks even further.
Want something more aggressive? Genessa can also take the Stray Doubles route. Abilities including Instigation, Communion, and Causality increase the damage of her spectral companions, while Mirage gives you some extra insurance by allowing a Stray Double to absorb a fatal hit.
To unlock Genessa, you need to progress through Marrow Keep, defeat Sester Secundus near the Abbey Entrance in eastern Mammon, obtain the Sester’s Censer, and return it to her.
Smert, the Apostate
Smert is where things start getting absolutely wild.
His Miracle can stop time, creating a window where you can build Chaos Stacks before time resumes and those stacks detonate. Striker improves Chaos Stack generation, while Fervor and Devotion help keep his ability cycle going.

There is, however, a very serious price attached to that power. Miracle consumes 50% of Smert’s current HP. That can actually help him reach his Faith threshold, but it also means using the ability at the wrong moment can leave you dangerously exposed.
Fortunately, Mether’s Pulse can help recover when the risk catches up with you.
Smert is essentially built around turning one dangerous mechanic into a devastating damage window. If you can manage his health and ability timing, his ceiling is enormous.
Gragu, the Insatiable
If your preferred solution to a difficult enemy is basically hit it until it stops moving, Gragu deserves your attention.
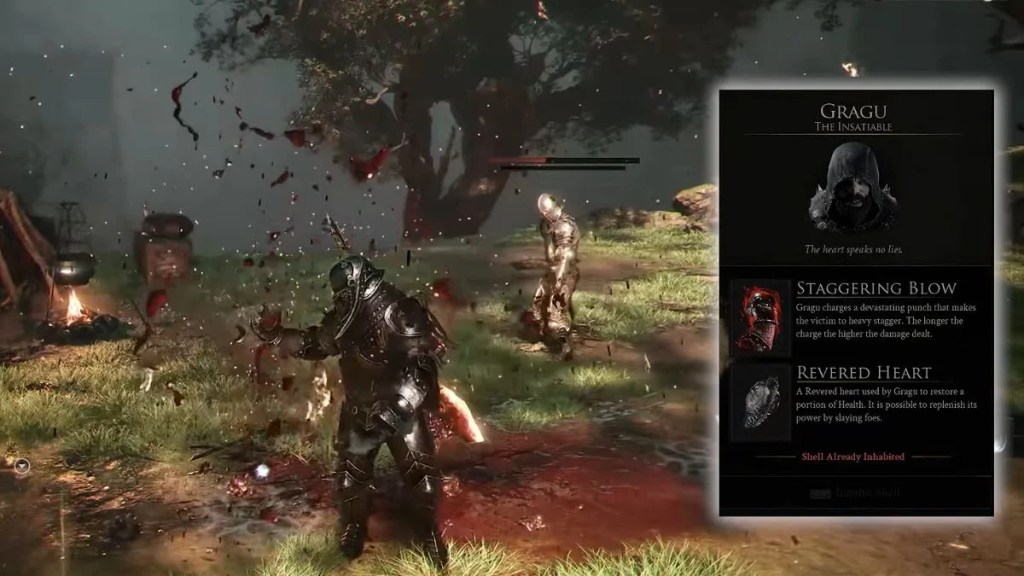
Gragu specializes in single-target burst. His kit stacks Melee and Critical damage multipliers, while Hunger can push Critical Hit Chance as high as 78% for melee attacks and 75% for ranged attacks.
Then there is Staggering Blow.
This ability can knock enemies down, break their posture, and apply both Weakened and Fragile, giving Gragu a powerful way to control individual targets while piling on damage. His Revered Heart ability also provides healing through kills, making him particularly comfortable during exploration.
Gragu can be found at the One-Legged Wolf Tavern east of Fainweald after the required Ova progress. You must retrieve the Heart of Vatra from the Temple of Vatra before you can claim his Shell.
Roster Rundown: Picking the standout pick from a stacked lineup is a challenge in more than one genre right now. For more, dive into our guide on Avatar Legends: The Fighting Game’s full launch roster, unlocks, DLC fighters and best playstyles.
A-Tier Shells: Still Extremely Strong
Lazlo, the Justicar
If you would rather survive the apocalypse than sprint directly into it, Lazlo is an easy Shell to consider.
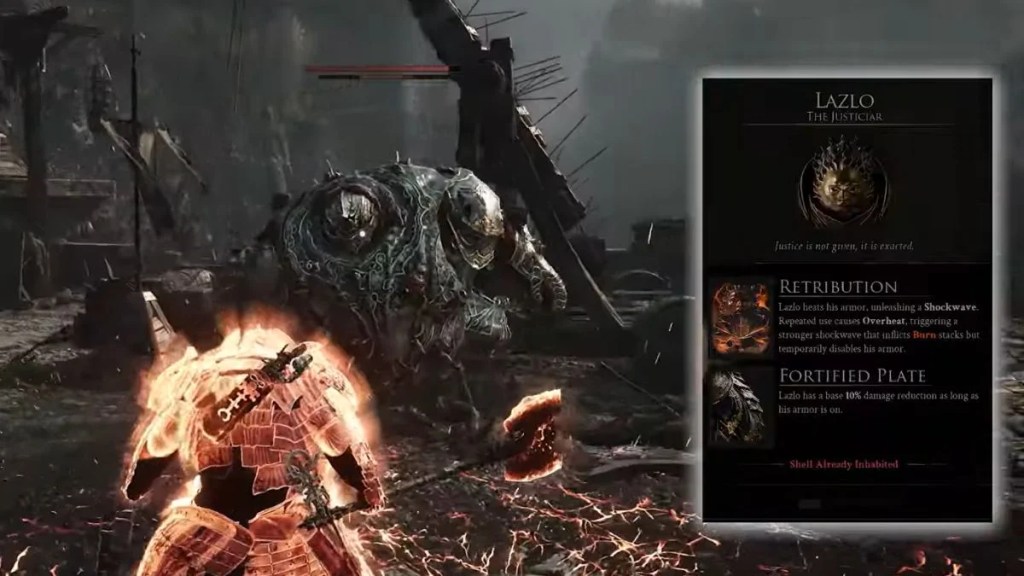
Warmed Up and Furnace can provide up to 30% Damage Reduction, while his efficient Resolve generation allows him to repeatedly use Skills, Infusions, and Tarstone Abilities.
Lazlo also has Worthy Armor, Temperament, Breaker, and Inflamed, giving him strong AoE potential through shockwaves and Burn effects.
His main weakness is boss damage. Lazlo can be incredibly durable and effective against groups, but some encounters demand more investment before his damage can compete with the best S-Tier Shells.
You can find Lazlo in the Royal Crypt in Mammon after defeating Lord Vellen.
Eredrim, the Venerable
Eredrim is all about Break Damage and Riposte, with Shoulder Bash sitting at the center of his combat identity.
His Oppression and Radiance abilities increase Break Damage, while Alacrity and Consecration help keep his abilities available.

Eredrim is particularly effective against bosses and other single targets, and Slaughterer adds an execute mechanic that can make already-weakened enemies much easier to finish.
There is a catch, though: his stacks reset after resting or being severed. If you want to get the most from Eredrim, maintaining that momentum is a big part of the challenge.
Sariel, the Endless
Sariel is arguably one of the most interesting Shells for players who value survivability above almost everything else.
His Pain mechanic lets him recover damage, with Frailty, Reaper, and Restoration supporting that entire loop.

The catch is that Pain demands careful management. Taking too many hits can erase the resource Sariel needs to heal, while his lower damage output can turn boss encounters into much longer fights.
In other words, Sariel can become incredibly difficult to kill, but only if you actually manage the mechanic correctly. One mistake can turn that defensive advantage into a major liability.
Role Call: Playing to a specific role’s strengths matters just as much in squad-based shooters as it does in picking a Shell. For more, check out our guide on Hell Let Loose: Vietnam’s best roles and how to play each one.
B-Tier Shells: Useful, But More Situational
Proxima, the Broodseeker
Proxima brings a versatile hybrid playstyle to the roster. Her kit includes Biosampler, Biohazard, Seizure, and Discharge, giving her access to crowd control and Lightning-based AoE attacks.
Defensively, Grafted Armor, Exoshell, Reflection, and Fortress give her plenty of useful tools to stay alive.
She also has a practical farming role because her Samples can help with Gold farming. The problem is that, compared with the Shells higher on this list, Proxima does not reach quite the same damage or defensive ceiling.
Still, if you want a flexible Shell that can handle groups while bringing useful utility to your build, Proxima remains a perfectly viable choice.
Tiel, the Acolyte
Tiel is a particularly appealing option during the early game, especially if you are still learning how Mortal Shell 2 expects you to move through combat.
His Shadow Dash and Shadow Strike abilities provide invisibility, while Deathmark, Critical Role, and Ambush support critical hits and Poison-focused gameplay.

That combination gives Tiel a very different rhythm from the more defensive Shells. Instead of standing there and absorbing punishment, you are looking for openings, disappearing when necessary, and striking back when the enemy least expects it.
The biggest problem appears later in the game. Generating enough Resolve for Shadow Strike consistently can become more difficult, and Tiel’s damage ceiling begins to look less impressive when compared with the strongest Shells.
You can find his body in a shallow grave east of Mushroom Village.
And Then There Is Harros
Before you start wondering why Harros is missing from the actual tier rankings, there is an important detail to remember.
Harros, the Vassal is only available during the prologue and cannot be kept as a permanent Shell. He introduces you to the Shell system before the game opens up access to the eight permanent options.
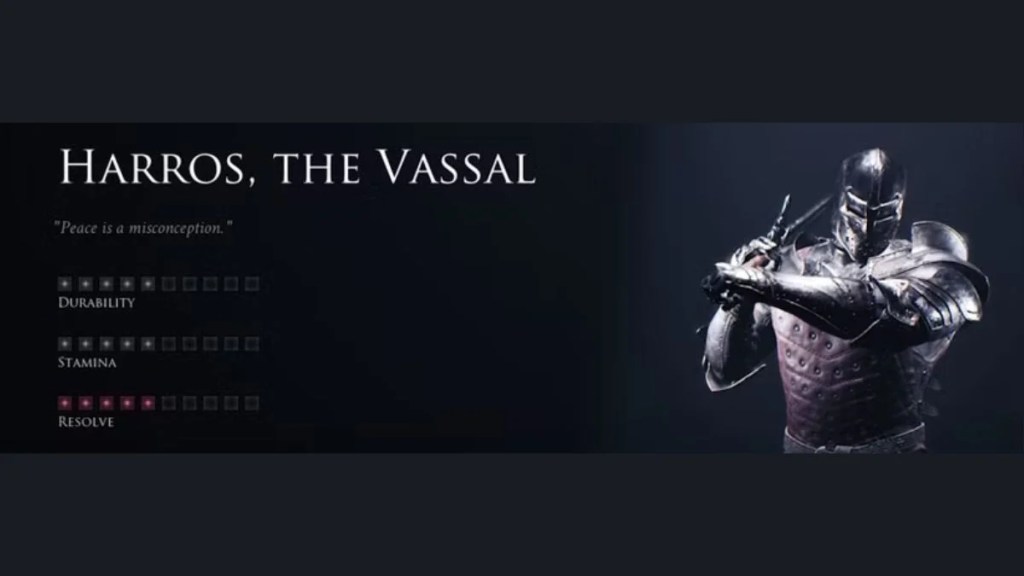
So, while Harros is part of your early experience, he is not one of the eight permanent Shells being ranked here.
Bond Building: Finding the companion or build that actually clicks with how you play is a grind worth sticking with. For more, check out our guide on maxing your Koo Rapport in Beast of Reincarnation to unlock the Closest Companion trophy.
So, Which Mortal Shell 2 Shell Should You Actually Pick?
If you want the short version, Genessa, Smert, and Gragu are the standout choices in the current early meta for players chasing optimized damage and survivability.
Genessa is the flexible option. Her doubles let you create safer damage opportunities while still playing aggressively.
Smert is the high-risk powerhouse. His Miracle can stop time and create devastating Chaos Stack setups, but the ability costs half of his current HP, so reckless use can punish you hard.
Gragu is the single-target monster. His Critical-focused kit, Hunger bonuses, Staggering Blow, and kill-based healing make him particularly nasty when fighting individual powerful enemies.
But do not read the tier list as a declaration that everyone outside S-Tier is somehow bad.
Tiel can be a comfortable introduction to the game’s combat, particularly if you enjoy stealth, dodging, critical hits, and Poison. Lazlo is excellent if durability and AoE are your priorities. Sariel can become extremely difficult to kill when his Pain mechanic is managed properly. Proxima has a useful farming niche and versatile crowd-control tools, while Eredrim remains a strong choice for players who enjoy direct, boss-focused combat built around Break Damage and Riposte.
Most importantly, every permanent Shell can clear the game’s content with the right setup.
This is an early launch-period tier list, not a permanent verdict. As players experiment with different builds, upgrades, weapons, Tarstones, Seals, and playstyles, the Mortal Shell 2 meta can absolutely shift. Even a lower-ranked Shell can become the perfect choice if its mechanics fit the way you play.
Access Granted: Some of the best content in a game is locked behind a specific unlock condition you’d never guess on your own. For more, read our guide on how to unlock Bubbly Basin in Pokémon Pokopia, including dive requirements and entrance location.
Disclaimer
This tier list is based on launch-period community and guide rankings and is not an official ranking from Cold Symmetry or Playstack. Shell performance can vary depending on upgrades, equipment, player skill, and personal playstyle. A lower-ranked Shell is therefore not necessarily a worse choice for every player.
Featured Image Credit: Cold Symmetry / Playstack


Leave a Reply