

Part 5: Richard throws you into one of the more exploration-heavy sections of Silent Hill: Townfall, and CEG Headquarters is basically a giant maze of locked doors, strange versions of Richard, scattered documents, coded rooms and one very important projector.
Your job is to push through the distorted CEG building, restore its power, climb through the upper floors, collect the parts needed to repair the Boardroom projector, hunt down six Projector Slides and finally solve the presentation puzzle that unlocks the route to the 10th floor.
If you’re going for a thorough run, there are also plenty of documents, supplies and optional storage rooms hiding along the way. Here’s the complete Part 5: Richard walkthrough, in order.
Part 5: Richard — What You Need to Do
The main progression is:
- Enter CEG Headquarters.
- Restore power to the elevator.
- Reach the upper floors.
- Obtain the Access Card – Level 3/4.
- Find the Projector Bulb.
- Find the Projector Lens.
- Repair the projector.
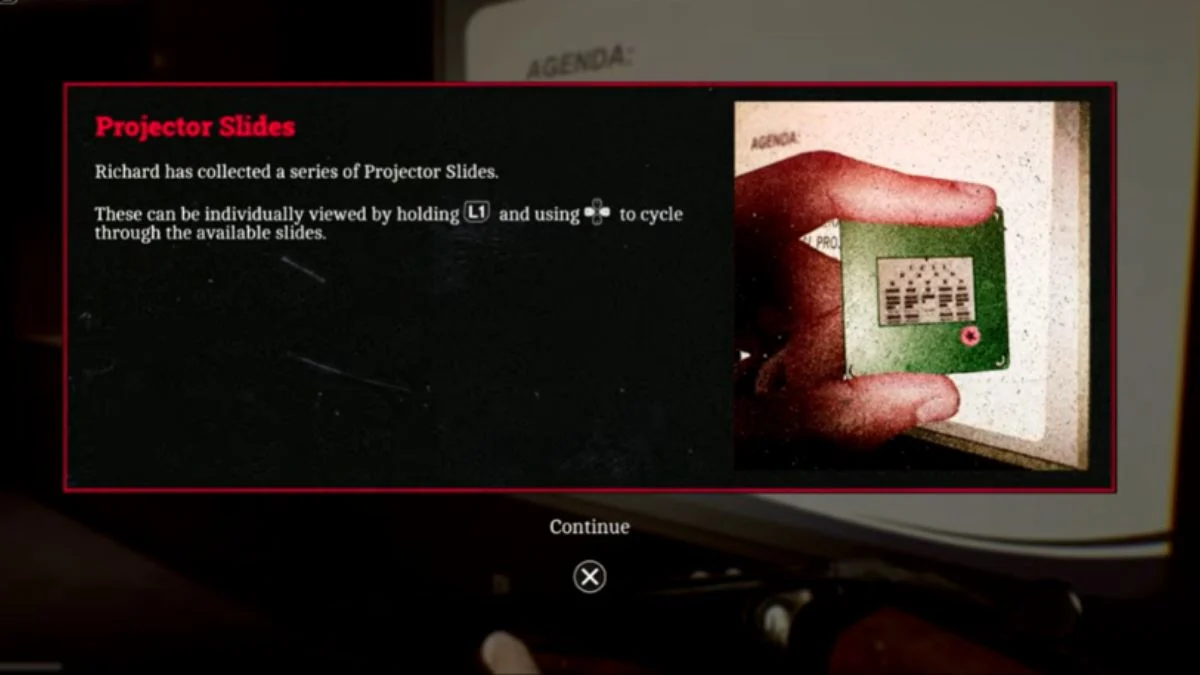
- Obtain the Projector Slides.
- Solve the six-slide projector puzzle.
- Get the CEO Access Card.
- Ride the elevator to the 10th floor.
- Complete Part 5.
There are also optional documents, supplies and coded storage rooms worth checking if you’re trying to clear the chapter thoroughly.
Thirteen Calls, One Trophy: Did you know a single missed phone conversation can keep you from unlocking Cold Calling, even after you’ve found every number?
Find out exactly which calls need to finish, and when, in our Silent Hill: Townfall All 13 Phone Numbers: How to Find and Call Every Number guide.
Enter CEG Headquarters
Richard starts outside CEG Headquarters, with protest flyers scattered around the entrance.
Move forward and follow the path toward the small yellow security building. The gate leading toward the road is already open, so go around the back of the security building and enter.
Inside, interact with the button to open the larger gates.
Once they’re open, you can enter the parking area surrounding CEG Headquarters.
Grab the Construction Halted Notice
Before heading into the main building, go left into the portable building.
Continue through the door into the office area. Check the filing cabinet to collect the:
Construction Halted Notice
This is an optional document, but grab it if you’re collecting everything.
There’s also a locked locker in this office. Don’t worry about it yet — you’ll come back here after restoring the building’s power.
Enter the Main CEG Building
Leave the portable building and approach the garage shutter at the main CEG building.
Interact with it to raise the shutter and enter.
Immediately check the desk on your right to collect:
CEG Kiosk Note
Continue farther inside. You’ll soon see a fast-moving entity disappear up the stairs.
You can’t simply follow it toward the upper floors yet, so continue along the available route.
Before moving on, unlock the front door on the right. This creates a useful shortcut back toward the entrance.
There’s also a nearby telephone that you can use to save your game.
Find the Generator Key
Enter the Workshop.
On the central table, you can collect:
Alcohol
Continue upstairs and enter the Manager’s Office.
Inside, check the small wall cabinet on the right. That’s where you’ll find the:
Generator Key
Before leaving, check the desk to collect:
CEG Memo
Now leave the Manager’s Office.
Continue through the corridor and exit through the open fire exit. Once you’re outside, go down the steps and follow the path around toward the fenced generator area.
Restore Power to the Elevator
Use the Generator Key on the generator panel.
After inserting the key, activate the generator and then use the lever in the lower-left area.
Three warning lights will appear.
That’s your clue that the pumps behind the generator need to be adjusted.
Generator puzzle solution
First, interact with all three pumps.
Then try activating the generator again.
You’ll discover that Line C works while Lines A and B fail.
Head back to the pumps and change their settings.
The correct configuration is:
| Pump | Setting |
| Left | Off |
| Middle | Off |
| Right | On |
So, in simple terms: turn off the left and middle pumps and leave the right pump on.
Return to the generator and activate it again.
With that configuration, the generator successfully restores power.
Get the Facilities Documents and Locker Code
With the electricity back on, return to the portable building near the entrance.
Enter the room on the right and interact with the computer.
You can read two emails:
- Facilities: Works Halted
- Facilities: “DONTREAD.DOC”
The second document gives you the combination for the locked locker elsewhere in the building.
Locker code: 147
Return to the locked locker and enter:
147
Inside, you’ll find a:
First Aid Kit
Take the Elevator Up
Now leave the portable building and head to the elevator.
Interact with the control panel.
First press Power, then press the Up arrow.
The elevator takes Richard to the scaffolding above the building.
Follow the walkway and open the gate around the corner. Continue up the slope and follow the path toward the ladder.
Climb the ladder and continue along the upper walkway.
Eventually, you’ll reach another ladder leading downward.
Climb down through the opening and follow the route until you reach a window.
Crouch through the open window and drop into the meeting room.
Interact with the door on the left.
A cutscene plays in which Richard encounters a disturbing version of himself and obtains a:
Shotgun
That gives you another important progression item before the real CEG HQ exploration begins.
Who Set the Infusion Rate for an 88 kg Patient?
Can you keep Zoe’s patient alive through vitals, X-rays, three hunted medicines and a final intubation while monsters patrol the hospital halls?
Follow every step in our Silent Hill: Townfall Zoe: The Patient Guide — How to Save the Patient walkthrough.
Explore the Upper Floors of CEG Headquarters
Leave the meeting room and enter the large central lobby.
From here, you’ll start encountering multiple versions of Richard throughout the building.
Before taking the stairs, check the bathroom in the back-right section of the lobby.
You can collect:
- Gauze
- Alcohol
Around the first flight of stairs, you can also collect the:
CEG HQ – Building Map
The map covers the building’s five main floors and becomes especially useful because Part 5 involves plenty of backtracking.
Find the CEG Tower Meeting Minutes
Continue upward.
On the third floor, enter the Meeting Room on the opposite side of the lobby.
Check the table to collect:
CEG Tower Meeting Minutes
Continue toward the fourth floor.
Navigate Floors 4 and 5
The upper floors aren’t exactly a relaxing office tour.
There are numerous hostile encounters, and enemies can appear around corners and inside rooms. Take your time when moving through unfamiliar areas and check your surroundings before committing to a route.
On the fourth floor, head toward the central lobby.
Go through the open doors to the left of the elevators.
Continue to the end of the corridor and turn left.
Use the card reader beside the double doors to enter the next stairwell.
Keep climbing until you reach the fifth floor.
Reach the Boardroom
The fifth floor opens into a large area with the Boardroom ahead.
Approach the Boardroom and the nearby elevators.
When Richard attempts to use the elevator, a cutscene triggers. The elevator drops away, forcing Richard into the Boardroom.
Inside, a presentation titled:
“Richard’s Future at CEG”
is playing.
Richard responds:
“Let’s try this again.”
And that’s where the projector puzzle sequence really begins.
Get the Access Card – Level 3/4
Once you regain control, head to the table and pick up:
Access Card – Level 3/4
There’s also a nearby telephone you can use to save.
Now interact with the projector in the centre of the Boardroom.
Turn it on and inspect the information sticker on its side.
You’ll discover that two components are missing:
- Projector Bulb
- Projector Lens
Their locations are added to your map.
And yes, you’re going to have to leave the Boardroom and go hunting through CEG HQ to find both.
Find the Projector Bulb
Leave the Boardroom and head back downstairs.
Use your newly obtained Access Card – Level 3/4 to enter the Human Resources area.
You can explore the HR Records room for additional supplies before continuing.
Use the card again on the opposite side to create another shortcut through the building.
Now return toward the third floor.
Go into the lobby and use the Access Card to open the doors on the left side of the elevators.
Continue through the corridor and unlock the doors leading into P.R.
Collect the P.R. Documents
In the first room on the left, you’ll find a computer and a telephone.
Turn on the computer and read:
- CEG Tower: Evening News
- CEG Tower: Engineer Public Statement
Then check the darker room opposite.
Search the thin grey metal cabinet to find:
PR Meeting Note
That’s another document added to the collection.
Find Richard’s Note and Three More Codes
Continue through the P.R. area.
In the room opposite the central reception counter, inspect the floor near the corpse.
You’ll find:
Richard’s Note
This note contains three codes that become useful later:
| Location | Code |
| 1st Floor Storeroom | 4512 |
| 3rd Floor Records | 1607 |
| 2nd Floor Storage | 1306 |
Keep these numbers handy. You’ll be doing more than just solving the main projector puzzle in this chapter.
Open 3rd Floor Records
The keypad door for 3rd Floor Records is close to the room where you found Richard’s Note.
Enter:
1607
Inside, you’ll find additional healing supplies and ammunition.
After looting the room, unlock the door at the far end of the P.R. area. This creates another shortcut.
Then return toward the stairs near the P.R. reception desk.
Find the CEG Storeroom Key
Climb the stairs.
At the top, move around to the left and unlock the door.
Cross through the room toward the office on the opposite side.
Near the Richard corpses, you’ll find:
CEG Storeroom Key
This is the key you need for the next major step toward the projector.
Get the Projector Bulb
Use the CEG Storeroom Key to enter the Storeroom.
Inside, locate the cabinets along the back wall.
Open the General Storage cabinet.
Inside you’ll find:
- Projector Bulb
- CEG Checkout Sheet
The Projector Bulb is one of the two missing components from the Boardroom projector.
The CEG Checkout Sheet is equally important because it explains where the Projector Lens is located and gives you the code needed to access it.
That code is:
2709
3 kV and 7 mA, Then Suddenly the Opposite:
Why does the chest scan flip the very numbers that worked for the skull, and what stops the green button from firing?
Get the exact settings and alignment fixes in our Silent Hill: Townfall X-Ray Puzzle Guide: 7103 Code, Skull and Chest Scan Settings post.
Find the Projector Lens
With the Projector Lens location marked, return to the third floor.
Use the stairwell in the lower-right section of the fourth-floor map to descend.
Enter the third-floor lobby and use the doors to the left of the elevators.
Continue toward the locked Finance area.
Use the Access Card – Level 3/4 on the card reader.
Then enter:
2709
The Finance doors will open.
Retrieve the Projector Lens
Enter the CFO office in the back-right section of Finance.
Open the desk drawer.
Inside you’ll find:
Projector Lens
Now you’ve got both missing projector components:
- Projector Bulb
- Projector Lens
Time to take them back to the Boardroom.
Repair the Boardroom Projector
Return to the fifth-floor Boardroom.
Interact with the projector.
Install the components in this exact order:
- Projector Bulb
- Projector Lens
Once both parts are installed, activate the projector.
The room changes, and the location of the Projector Slides is added to your map.
A new key item also becomes available.
Get the CEG Maintenance Key
After activating the projector, inspect the Richard corpses around it.
One of them is holding:
CEG Maintenance Key
Take it.
You’ll need this key to access the building’s maintenance route and reach the lower floors where the Projector Slides are waiting.
Find the Projector Slides
Leave the Boardroom.
Instead of taking the stairs downward, turn right and use the CEG Maintenance Key to open the door.
Immediately turn right and climb down the ladder.
From here, continue through the maintenance route.
Use the Maintenance Key on the locked doors when necessary and keep descending through the successive ladders.
Continue downward until you reach the second floor.
Enter the Operations area after unlocking the final door.
Continue through the building until you reach the stairwell leading to the first floor.
On the first floor, pass through the I.T. area and enter the lobby.
Use the Optional Storage Codes
Before going after the Projector Slides, you can use the codes from Richard’s Note to open two additional storage rooms.
These areas are optional, but they’re useful if you’re going for a thorough run and want the extra supplies.
2nd Floor Storage — Code 1306
In Operations, find the storage room and enter:
1306
Inside, you’ll find additional supplies.
1st Floor Storeroom — Code 4512
In the Administration section on the first floor, locate the keypad-locked Storeroom.
Enter:
4512
This opens another supply room containing additional resources.
With both optional storage areas checked, it’s time to finally grab the slides.
Collect the Projector Slides
From the first floor, descend to the Mezzanine using the stairs in the lower-right section of the map.
At the bottom, go through the door on the left.
Follow the route through the next room until you reach a meeting room near a blocked staircase.
On the table, collect:
Projector Slides
You now have everything needed for the Boardroom projector puzzle.
Return to the Boardroom
Now comes the backtracking.
Make your way through the building toward the fifth-floor Boardroom.
As you travel back upward, the building’s conditions change and smoke begins filling some of the floors.
Continue toward the maintenance route and use the consecutive ladders to reach the upper levels more quickly.
Eventually, you’ll make it back to the Boardroom.
This time, you can examine the individual projector slides and match them to the meeting agenda.
Silent Hill: Townfall Projector Slide Puzzle Solution
The projector displays a six-point agenda, with each agenda item corresponding to one of the six slides.
You need to place the slides into the correct numbered positions.
The solution is:
| Slot | Agenda Item | Correct Slide |
| 1 | Recent Headlines | Slide D |
| 2 | External Demonstrations | Slide F |
| 3 | Company Hierarchy | Slide B |
| 4 | Financial Projections | Slide C |
| 5 | Public Enquiry | Slide E |
| 6 | Counter Arguments | Slide A |
Final Projector Order
D → F → B → C → E → A
Insert the slides in exactly that order.
Once all six are correctly positioned, back out of the projector interface and press the Play button.
If you’ve loaded them correctly, the projector sequence begins.
If you’re stuck, don’t overthink it: the complete answer is simply D, F, B, C, E, A.

What the Projector Reveals
The presentation isn’t just another puzzle sequence — it drops some important story information.
The presentation reveals more about Richard’s situation at CEG and establishes that Simon is connected to Richard’s tribunal as a supposed “star witness.”
It also reveals Richard’s full identity:
Richard Shaw, CEO of CEG.
That revelation adds important context to the relationship between Richard, Simon and the events surrounding CEG.
Once the presentation ends, Richard receives:
CEO Access Card
That’s the key to the final section of Part 5.
Reach the 10th Floor
Leave the Boardroom and head to the elevator.
Use the CEO Access Card on the elevator’s card reader.
Enter the elevator and press:
10
The elevator takes Richard to the 10th floor.
Once you arrive, move around to the computer on the desk.
Interact with it and read:
CEG Tower: He’s Done
This is the final document of the chapter.
After reading it, head toward the illuminated office.
Enter the room to trigger the next cutscene.
Richard sees several versions of himself scattered around the room.
Then Simon appears.
Richard welcomes him, bringing Part 5: Richard to its conclusion.
The game then moves into:
Part 6: Simon
Your Score Was Being Tracked All Along: Why do Simon’s kills, Cannula Refills and even a handful of Zoe’s puzzle mistakes quietly decide which finale you get?
See how the hidden numbers add up in our Silent Hill: Townfall All 5 Endings Guide: How to Unlock Justice, Forever, Abandoned, Dog and Sci-fi-lent Hill breakdown.
Silent Hill: Townfall Part 5 Richard — Complete Checklist
If you’re trying to make sure you didn’t miss anything, use this checklist before moving on.
Documents
- Construction Halted Notice
- CEG Kiosk Note
- CEG Memo
- Facilities: Works Halted
- Facilities: “DONTREAD.DOC”
- CEG Tower Meeting Minutes
- CEG Tower: Evening News
- CEG Tower: Engineer Public Statement
- PR Meeting Note
- Richard’s Note
- CEG Checkout Sheet
- CEG Tower: He’s Done
Key Items
- Generator Key
- Shotgun
- Access Card – Level 3/4
- CEG Storeroom Key
- Projector Bulb
- Projector Lens
- CEG Maintenance Key
- Projector Slides
- CEO Access Card
Important Codes
- 147 — Portable building locker
- 1607 — 3rd Floor Records
- 2709 — Finance
- 1306 — 2nd Floor Storage
- 4512 — 1st Floor Storeroom
Projector Solution
D → F → B → C → E → A
Once you’ve completed the projector sequence, obtained the CEO Access Card, taken the elevator to the 10th floor, read CEG Tower: He’s Done, and entered the illuminated office, Part 5: Richard is complete.
Richard’s CEG nightmare has reached its next stage — and the game moves into Part 6: Simon.
Image Credits:
- Featured Image: Konami / Screen Burn Interactive / YouTube via GosuNoob
- Image 2: Konami / Screen Burn Interactive / YouTube via GosuNoob


Leave a Reply