
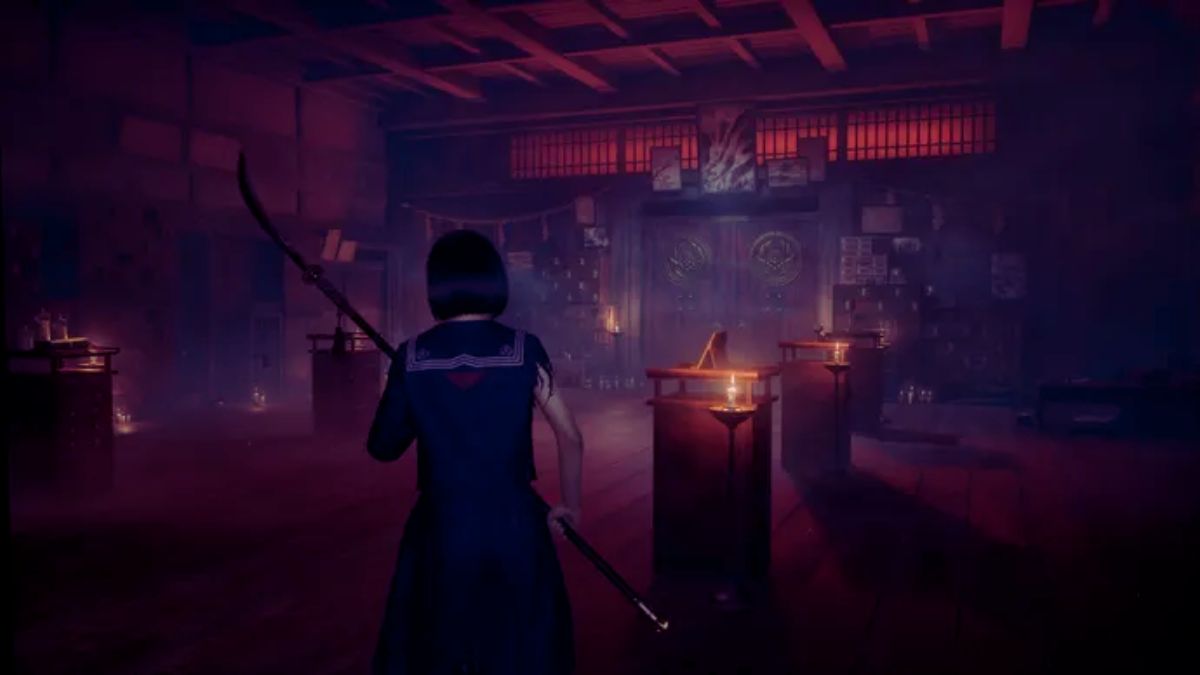
Few moments in Silent Hill f blend horror and heartbreak quite like the Memories Puzzle. Taking place in the Worship Hall’s final chamber, this sequence serves as both a scavenger hunt and a meditation on memory, loss, and the remnants of a broken mind.
After confronting the torments of Rinko and Sakuko, Hinako faces one last task — restoring the keepsakes of her friend Shu, a boy whose obsession with remembrance becomes a shrine of its own.
In this guide, we’ll walk through how to complete the Memories Puzzle in Silent Hill f, detailing every item location, difficulty variation, and the symbolic meaning behind this haunting final test of the Worship Hall chapter.
In This Post:
Overview – The Memories Puzzle Explained
Unlike most puzzles in Silent Hill f, which test logic or observation, the Memories Puzzle leans toward emotional exploration. The goal is simple on paper — find Shu’s missing possessions scattered throughout a dimly lit maze and return them to their rightful pedestals in his “museum.”
Each item you recover restores part of Shu’s fractured self, and with it, opens the path forward — quite literally, as the north door of the display room unlocks once the collection is whole again.
| Puzzle Name | Location | Objective | Rewards |
| Memories Puzzle | Worship Hall (Shu’s Display Room) | Recover Shu’s missing items and place them on their podiums. | Access to the final Worship Hall exit; transition to Ebisugaoka with full health/sanity restore. |
After completing this puzzle, the chapter concludes automatically, returning Hinako to Ebisugaoka — a brief breath before the fog returns.
How to Start the Memories Puzzle?
Once both Tri-Scale Emblem Key and White Rabbit Emblem Key have been used, a new door opens at the back of the Worship Hall. Beyond it lies Shu’s memory museum, a surreal collection of mementos preserved from another life.
- Inspect the Note beside the large double doors in the display room.
- The note explains that certain objects are missing from Shu’s exhibit.
- This action triggers the Memories Puzzle and opens the corridor maze behind the sliding door to your left.
The number of missing items depends on your puzzle difficulty setting.
Memories Puzzle Difficulty Breakdown
| Difficulty | Missing Items | Count |
| Story | Brainiac Hero Comic | 1 |
| Hard | Brainiac Hero Comic, Drawing of a Young Shimizu Hinako | 2 |
| Lost in the Fog | Brainiac Hero Comic, Drawing of a Young Shimizu Hinako, Raygun | 3 |
Each item has a fixed location, though reaching them requires navigating a maze filled with grotesque enemies — including your first encounter with a “spawner,” a creature symbolic of corrupted birth and memory.
Item Locations in the Memories Puzzle
Below is a detailed breakdown of where to find Shu’s Prized Possessions, organized by difficulty.
Story Mode – Brainiac Hero Comic
| Item | Location | Directions | Notes |
| Brainiac Hero Comic | Second floor of the octagonal chamber | From the lower floor, climb the stairs and look to the right — the comic rests on a small table opposite the fox-gate lever. | Always present regardless of difficulty. |

The comic represents Shu’s childhood innocence — a nostalgic fragment of simpler times before the fog of guilt settled in. Finding it restores not just an object, but a piece of what Silent Hill stripped away.
Hard Mode – Brainiac Hero Comic & Drawing of a Young Shimizu Hinako
| Item | Location | Directions | Notes |
| Brainiac Hero Comic | Same location as Story Mode | Follow the same route upstairs to retrieve the comic. | — |
| Drawing of a Young Shimizu Hinako | Short corridor near the first gate switch | From the entrance hallway, move north, turn right at the flickering candlelight, and defeat the creature guarding the dead end. The drawing rests on a small table. | Easy to overlook from a distance — appears only on Hard and Lost in the Fog. |

Hinako’s childhood drawing serves as a mirror — a self-portrait that symbolizes how her memories intertwine with Shu’s. This connection becomes the emotional thread that binds the puzzle together.
Lost in the Fog Mode – All Three Items (Comic, Drawing, Raygun)
| Item | Location | Directions | Notes |
| Brainiac Hero Comic | Second floor, near fox gate lever | Follow same steps as previous difficulties. | — |
| Drawing of a Young Shimizu Hinako | Candle-lit hallway near the first switch | Turn right from the main corridor; guarded by a creature. | — |
| Raygun | Boss arena (first floor) | Found beside open medical cabinets after defeating the Birthing Mother mini-boss. | Exclusive to Lost in the Fog difficulty. |

The Raygun — an almost childlike toy-weapon — contrasts violently with the biological horror of the Birthing Mother. It embodies escapism: a defense born from imagination rather than power, making its recovery deeply symbolic in Silent Hill’s psychological landscape.

The Birthing Mother Mini-Boss Encounter
To claim the Raygun, you’ll face the Birthing Mother, a grotesque creature that spawns enemies from its own decaying body. Below is a quick reference table for surviving the encounter.

| Attack | Description | Countermeasure |
| Enemy Spawn | Expels flesh pods that burst into enemies. | Destroy the pods before they hatch. |
| Acid Spit | Launches corrosive projectiles in arcs. | Dodge sideways when it charges its attack. |
| Body Charge | Rushes forward to knock Hinako down. | Strike then retreat to maintain distance. |
| Stun Shriek | Emits an area-of-effect scream reducing sanity. | Stay as far away as possible to minimize damage. |
Defeating this boss not only clears the path but unlocks the Raygun’s resting place — a reward that blends both gameplay progress and thematic closure.
Returning the Memories
Once all missing items are collected:
- Return to Shu’s display hall via the shortcut opened by the fox-gate lever.
- Hinako will automatically place each object on its correct pedestal.
- The north door unlocks, symbolizing closure — and the end of the Worship Hall chapter.
| Final Action | Result |
| Place all Shu’s Prized Possessions | Unlocks the northern exit door |
| Transition to Ebisugaoka | Health & Sanity fully restored |
Insight: This restoration sequence quietly mirrors Hinako’s own struggle — piecing together fragments of memory and guilt to move forward. The act of remembrance becomes an act of survival.
Symbolism Behind the Memories Puzzle
Every Silent Hill puzzle carries emotional resonance beneath its mechanics, and this one is no exception:
- The Brainiac Hero Comic reflects innocence lost — a token from childhood before trauma.
- The Drawing embodies identity and memory, hinting that Hinako’s and Shu’s fates are spiritually intertwined.
- The Raygun, almost absurd amid the horror, represents hopeful delusion — the belief that imagination can protect from pain.
Restoring these items doesn’t just open a door — it reassembles the idea of self within a world that constantly tries to unmake it.
More Silent Hill f Guides:


Leave a Reply