

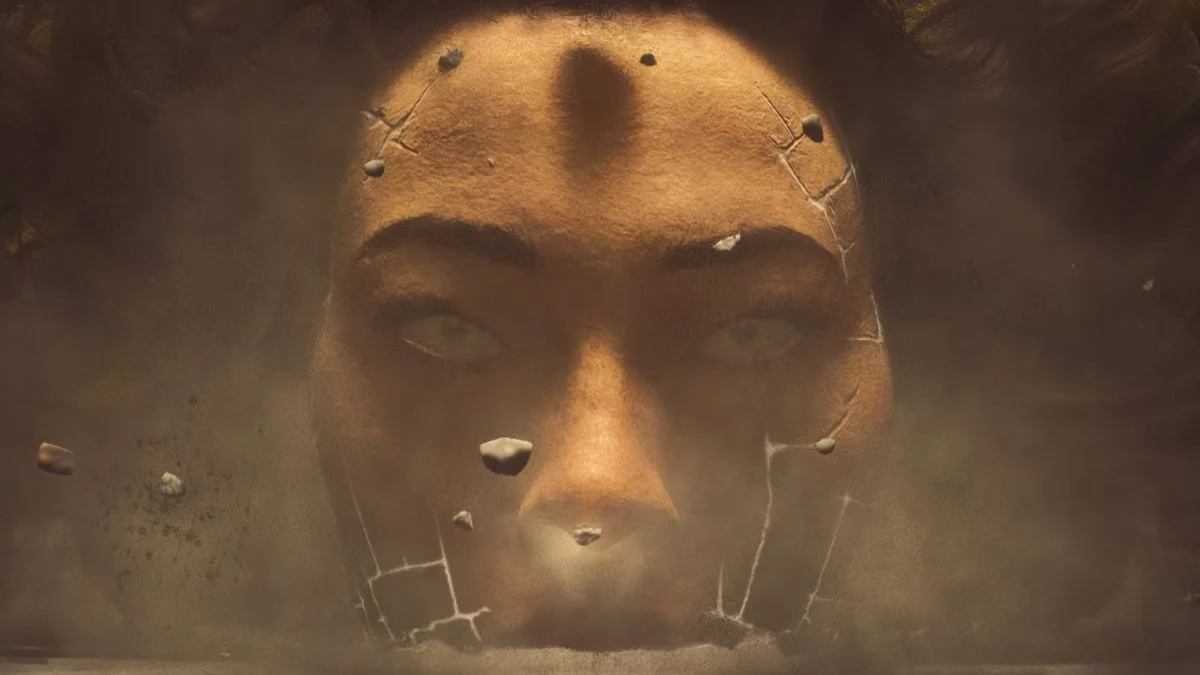
The first major boss in Control Resonant wastes absolutely no time testing whether you have actually learned Dylan’s movement and combat mechanics. The Artist appears during the opening Orientation mission in Downtown, and this giant floating entity can quickly overwhelm players with flying vehicles, sweeping metal beams, falling rubble, and an aerial phase that completely changes the flow of the battle.
The good news is that The Artist is far more predictable than it initially looks. The key is knowing when to dodge, when to take the fight into the air, and when to close the distance for melee attacks. Once you bring the boss down, you will also unlock your first choice of three Resonant Combat Abilities: Barrage, Volatile Anomaly, or Shield, making this fight a major early-game progression point.
Where to Find The Artist in Control Resonant
The Artist appears during the Orientation mission in Downtown.
This is a mandatory early-story encounter rather than an optional fight that you can tackle whenever you want. As you follow Dylan through the opening storyline and his search across the altered Manhattan environment, you will eventually enter The Artist’s arena.
The encounter is essentially a combat tutorial wrapped inside a full boss battle. It introduces several mechanics that become increasingly important later, including dodging, aerial movement, Falter, and attacking during specific openings.
And honestly, learning those mechanics here will make the rest of the game much easier.
Already looking past your first boss fight and wondering what else is lurking beneath Manhattan? Six hidden labs and a seriously strange final puzzle are waiting well past this opening encounter. Check our earlier coverage of Control Resonant Unsupervised Science Guide: All 6 Testing Facilities, Puzzles and Threshold Solution
How The Artist Attacks
The Artist’s movement can make the fight look chaotic at first. The boss floats around the arena, manipulates the environment, and constantly forces Dylan to react to attacks coming from different directions.
Most of those attacks still have recognizable visual cues, though. Once you know what to look for, the fight becomes much easier to read.
Dodge The Artist’s Flying Vehicles
One of The Artist’s most dangerous ranged attacks involves the boss lifting vehicles into the air and throwing them toward Dylan.
When vehicles start floating around The Artist’s head, get ready to move.
Rather than simply sprinting away, wait for the vehicle to approach and dodge to the left or right shortly before it reaches you. The resulting explosion covers a sizeable area, so staying on the same line can still get Dylan caught in the blast.
Once you successfully avoid the explosion, use the opening to close the distance.
The Artist can reposition quickly, so spending the entire fight trying to stay far away is not particularly useful.
If reading these attack cues on the fly feels rough, you don’t have to fight on default settings. Control Resonant lets you tune difficulty, camera assist, and more to match your own pace. Read our guide on Control Resonant Assist Mode Guide: How to Customize Every Part of Combat
Dodge Sideways When The Artist Uses Its Beams
When Dylan gets close, The Artist changes its attack pattern and can slam large metal beams down directly in front of itself.
When the beams come crashing down, dodge sideways instead of trying to retreat straight backward.
The arena may not always give Dylan enough room to escape backward, while a lateral dodge can move him completely outside the attack’s path. It also gives you a better chance to stay close enough to resume attacking.
Jump Over the Sweeping Beam Attacks
The sweeping beam attacks are where Dylan’s aerial movement becomes especially important.
The Artist can sweep its beams across the arena, covering both the ground and the space above it. Instead of trying to outrun the entire attack, jump and attack while airborne.
Keep striking while Dylan is in the air. This can keep him above the horizontal portion of the attack while allowing you to continue damaging the boss.
The basic sequence is simple:
- Close the distance.
- Attack The Artist.
- Watch for the beam attack.
- Jump as the sweep begins.
- Continue attacking while airborne.
- Return to the ground after the attack ends.
- Prepare for The Artist to reposition.
Once the boss moves away, the fight shifts back toward its ranged attacks.
Boss patterns aren’t the only place where a single wrong move changes everything. In this world, it’s entire branching outcomes that hinge on the choices you make along the way. Our story covers The Blood of Dawnwalker All Endings Guide: How to Unlock Every Ending
Float Over The Artist’s Rock Barrage
The Artist can also pull chunks of rubble from the ground and launch them horizontally toward Dylan.
Your safest response is to get airborne and jump or float over the incoming rubble.
When you are already close to The Artist, this can do more than simply keep you safe. It can also help you move toward the boss while it remains committed to its attack animation.
That matters because The Artist is much easier to pressure when Dylan is close rather than constantly chasing the floating boss around the arena.
The Artist’s Aerial Phase Explained
The fight changes significantly after you remove roughly one-third of The Artist’s health.
The boss moves toward the center of the arena and rises into the air. At the same time, pieces of the surrounding ground rise up and create a series of temporary platforms.
This is not a moment to sit back and wait for The Artist to land.
Climb the Platforms to Reach The Artist
As The Artist rises, climb the platforms that appear around the arena.
The crucial moment comes when the boss begins manipulating those platforms vertically. Use the extra height to jump toward The Artist and attack while airborne.
The aerial section is a major part of the encounter, and reaching the boss from the raised platforms is the intended way to continue dealing damage during this phase.
Once the sequence ends, Dylan returns to the arena floor and the normal battle resumes.
How to Survive The Artist’s Thrown Platforms
After returning to the ground, The Artist gains another environmental attack. The boss begins throwing the platforms that were previously floating around the arena.

For this section, one of the safest strategies is to run around the outer edge of the arena instead of remaining directly underneath The Artist.
Listen for the sound that indicates the boss is throwing a platform. When the projectile comes toward Dylan, dodge forward or sideways to get out of its trajectory.
Keep moving and continue dodging until The Artist has used up the platforms it can throw.
Once there are no more platforms available, the boss descends and returns to its normal attack pattern.
Watch Out for Falling Rubble
The Artist also has an attack connected to its rapid repositioning.
When the boss quickly moves across the arena, rubble can fall from above along the route it has just traveled.
Do not run directly behind The Artist along that same path.
Instead, move sideways and stay away from the line where the debris is falling. The rubble follows a relatively predictable route, so changing direction makes this attack much easier to avoid.
How to Dodge the Double-Car Attack
Later in the fight, The Artist can throw two vehicles in succession.
This is an easy attack to underestimate because successfully dodging the first vehicle does not mean the sequence is finished. The second vehicle arrives shortly afterward and can catch Dylan during the recovery from the first dodge.
When you see the two-vehicle attack begin:
- Dodge the first vehicle.
- Immediately prepare for the second.
- Dodge again.
- Return to The Artist once both explosions have passed.
The important part is remembering that this attack requires two dodges, not one.
The Best Attack Rhythm Against The Artist
The Artist has plenty of ranged attacks, but the overall encounter becomes much easier once you recognize its rhythm.
Close the distance, attack, react to the current attack, then close the distance again.
The ranged attacks can be dangerous, but constantly trying to fight from a distance can actually make the battle drag out while giving The Artist more chances to throw vehicles and rubble.
Use the correct movement for each attack:
- Vehicles: Dodge shortly before impact, preferably sideways.
- Metal beams: Dodge sideways.
- Sweeping beams: Jump and attack while airborne.
- Horizontal rubble: Jump or float over it.
- Aerial phase: Climb the platforms and use the elevation to reach The Artist.
- Thrown platforms: Run around the arena’s outer edge and dodge the projectiles.
- Falling rubble: Move away from The Artist’s travel path.
- Two vehicles: Dodge twice.
Once you get this rhythm down, The Artist stops feeling like an unpredictable flying monster and starts feeling like a boss with a pattern you can exploit.
How to Finish The Artist
Near the end of the encounter, The Artist becomes staggered, or Faltered.
That is your signal that the boss is ready for the finishing sequence.
Approach The Artist and use the execution prompt when it appears. The supplied guide identifies the control as pressing down on the Left Stick to perform the finishing attack.
But do not immediately leave the arena after the execution.
Interact with The Artist’s body afterward. This is how you access the reward that expands Dylan’s Combat Ability options.
The Artist Rewards: Barrage, Volatile Anomaly, or Shield
Defeating The Artist gives you your first choice between three Combat Abilities:
Barrage
Barrage allows Dylan to launch projectiles at enemies.
It is the straightforward ranged option, giving a melee-focused setup an additional way to apply pressure from a distance. The Epic Games Store’s ability guide confirms that Barrage is one of the three abilities unlocked from The Artist.
Volatile Anomaly
Volatile Anomaly summons an entity that can also be thrown.
This gives Dylan another method of applying pressure without relying entirely on direct melee attacks.
Shield
Shield is the defensive option.
It can absorb damage and can also be used offensively through a Shield Bash after dodging. The Epic Games Store’s guide specifically describes Shield as absorbing damage and allowing Dylan to perform a Shield Bash when he dodges.
These three choices are mutually exclusive at this stage, although the game later allows you to use its ability-reset system to change your selection.
Which Combat Ability Should You Choose?
There is no single ability required for progression.
Barrage gives you a simple ranged option to complement Dylan’s melee attacks.
Volatile Anomaly suits players who like having another entity involved in their attacks.
Shield focuses on defense and can be useful when surviving encounters is the bigger challenge.
The important thing is to choose based on how you are already playing rather than treating this first reward as a permanent, mandatory build decision. The game’s ability-reset system means the selection can later be changed.
Once your new ability is locked in, you might run into a completely different kind of challenge elsewhere. One eerie facility swaps fists for a puzzle built around bags and a dial instead. For more, read our post on Silent Hill: Townfall Blood Transfusion Puzzle Solution: Blood Bag Locations and ORDELL Dial Guide
The Artist Boss Quick Solution
For players who just want the boss strategy without reading through the entire breakdown, here is the quick version:
- Stay mobile throughout the fight.
- When vehicles float around The Artist, prepare for the throw and dodge sideways shortly before impact.
- When The Artist uses its metal beams, dodge sideways.
- Jump and attack during sweeping beam attacks to stay airborne.
- When The Artist launches horizontal rubble, jump and float over it.
- After roughly one-third of the boss’s health is removed, climb the platforms when The Artist rises into the air.
- Use the elevated platforms to jump toward and attack the boss.
- Once The Artist returns to the ground, run around the arena’s outer edge while it throws the platforms.
- Avoid following directly along The Artist’s route when rubble begins falling from above.
- When two vehicles are thrown consecutively, dodge twice.
- When The Artist becomes staggered/Faltered, approach it and perform the execution by pressing down on the Left Stick when prompted.
- Interact with The Artist’s body afterward to access your first Combat Ability choice.
- Choose between Barrage, Volatile Anomaly, or Shield.
The Artist can look seriously overwhelming during a first attempt, especially while The Artist is flying around and the arena itself starts becoming part of the attack pattern. But once you recognize what each visual cue means, the battle becomes much more controlled.
The biggest lesson is not to treat this as a pure damage race. Dodge the attacks that demand it, use aerial movement to bypass sweeping attacks and rubble, climb the platforms during the aerial phase, and take every opening to close the distance. Master that rhythm, and The Artist becomes a much more manageable first major test of Dylan’s combat system.
Image Credit:
- Featured Image: Remedy Entertainment
- Image 2: Remedy Entertainment / YouTube via I.Eat.Games


Leave a Reply