


Portal Pods are one of the best quality-of-life items in Pokémon Pokopia, acting as a global storage system that lets you access the same inventory from anywhere in the world. Instead of filling your backpack with crafting materials, building blocks, or rare resources, you can store everything inside a Portal Pod and retrieve it from another one placed in a completely different region.
The item isn’t available right away, however. Depending on whether you own the Bubbly Basin DLC, there are multiple ways to obtain Portal Pods. Here’s everything you need to know, including every Portal Pod location, how to unlock the crafting recipe, and how to make additional copies.
Read More: If you’re just starting your adventure, it’s worth unlocking key traversal abilities first. Our How to Unlock Surf in Pokémon Pokopia guide explains how to reach areas like Bubbly Basin and other water-locked regions much earlier.
All Portal Pod Locations in Pokémon Pokopia
There are currently two ways to obtain your first Portal Pod:
- Collect the two free Portal Pods in Bubbly Basin (DLC)
- Unlock the Portal Pod recipe through Palette Town progression
The DLC route is significantly faster since you can obtain two Portal Pods almost immediately.
Read Next: Exploring Bubbly Basin becomes much easier once you’ve restored more habitats. If you’re still expanding the region, check out our Pokémon Pokopia Evolution & Habitats Guide to learn how habitat restoration unlocks new Pokémon and progression opportunities.
Bubbly Basin Portal Pod Locations (DLC)
If you own the Bubbly Basin DLC, you can find two free Portal Pods inside an underwater house.
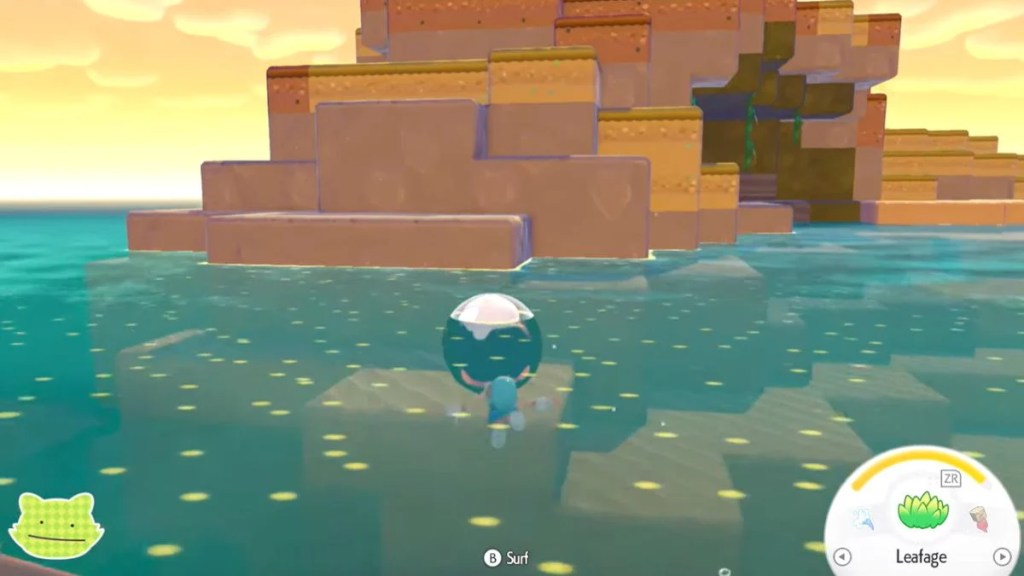
How to reach the underwater house
After unlocking Bubbly Basin and regaining control of Ditto:
- Start from the Bubbly Basin entrance.
- Swim toward the large ornate building near the center of the area.
- Continue past it toward the small island behind the structure.
- Dive underwater near the island.
- Look for a submerged house.
- Enter through the front door.
This house contains both Portal Pods.
Read More: Palette Town is home to several important unlocks beyond Portal Pods. If you’re still working through early progression, our How to Unlock Jump in Pokémon Pokopia guide covers another essential movement ability you’ll need throughout the game.
First Portal Pod Location
The first Portal Pod is impossible to miss.
As soon as you enter the underwater house, you’ll notice a Portal Pod placed directly in front of a staircase.
Although it appears to be furniture, it can actually be collected.
To pick it up:
- Equip Rock Smash
- Break the placed Portal Pod
- Pick it up afterward
Breaking it does not destroy the item—you’ll receive it in your inventory.

Second Portal Pod Location
After collecting the first Portal Pod:
- Walk downstairs.
- Turn left.
- Open the nearby doors.
- Continue into the room.
- Open the Poké Ball chest.
Inside you’ll receive your second Portal Pod.
With two Portal Pods collected, you can immediately begin using the shared storage network.
How to Unlock the Portal Pod Recipe (Non-DLC)
Players without the Bubbly Basin DLC aren’t locked out of Portal Pods.
Instead, you’ll need to progress through Palette Town.
Continue restoring the town and increasing its Environment Level. Eventually, the Portal Pod Recipe appears among the available Pokémon Center unlocks.
While the exact Environment Level hasn’t been officially confirmed, many players report the recipe appearing after reaching the higher Environment Levels, so simply continue improving Palette Town until it becomes available.
Once unlocked:
- Purchase the Portal Pod Recipe for 3,000 Life Coins
- Learn the recipe permanently
Read Next: Rare crafting projects eventually require much more than Pokémetal. If you’re preparing for larger builds, our How to Get Concrete in Pokémon Pokopia guide explains one of the game’s most important late-game construction materials.
Portal Pod Crafting Materials
After purchasing the recipe, craft a Portal Pod at a crafting bench.
You’ll need:
| Material | Quantity |
| Pokémetal | 10 |
| Rare Pokémetal | 1 |
This is the cheapest way to create your first Portal Pod if you don’t own the DLC.
How to Print More Portal Pods
After obtaining your first Portal Pod, you can duplicate it using the 3D Printer.
Step 1: Register the Portal Pod
Before printing copies, you must add it to the printer database.
To do this:
- Place a Portal Pod.
- Open the in-game camera.
- Press Y to switch to Reference Mode.
- Take a clear picture of the Portal Pod.
This registers it with the printer.
Read More: Since Portal Pods automatically supply nearby crafting benches, it’s a good idea to stock up on everyday materials. Our How to Make Paper in Pokémon Pokopia guide covers one of the resources you’ll use regularly while expanding your base.
Step 2: Visit a Rebuilt Pokémon Center
Travel to any rebuilt Pokémon Center that contains a 3D Printer.
Interact with the printer and select Portal Pod.
Each additional Portal Pod costs:
- 5 Rare Pokémetal
You can print as many Portal Pods as you want as long as you have enough Rare Pokémetal.
How Portal Pods Work
Portal Pods are connected to one another.
Think of them as one giant shared storage chest.
If you store resources in one Portal Pod, they’ll automatically be available inside every other Portal Pod you’ve placed.

For example:
- Store all your wood, stone, and Pokémetal inside a Portal Pod at Palette Town.
- Travel to Bleak Beach.
- Place another Portal Pod.
- Open it.
Every stored item will already be there.
Likewise, anything you place into the Bleak Beach Portal Pod will also appear back in Palette Town.
This shared inventory works instantly, making long-distance resource management much easier.
Read Next: Setting up a Portal Pod near your farms can also save plenty of inventory space. If you’re growing crops, don’t miss our How to Get Wheat in Pokémon Pokopia guide for one of the game’s most useful cooking ingredients.
Portal Pods Also Work With Crafting
Portal Pods become even more valuable during construction projects.
If a Portal Pod is placed next to a crafting bench, the bench automatically pulls crafting materials directly from its shared inventory.
That means you don’t need to:
- Carry building materials
- Constantly move items between inventories
- Return to your base every time you run out of resources
Simply leave your materials inside a Portal Pod and craft normally.
Best Places to Keep Portal Pods
Once you can print extras, it’s worth placing Portal Pods in locations you visit regularly, such as:
- Your main base
- Palette Town
- Bleak Beach
- Withered Wasteland
- Bubbly Basin
- Any active habitat restoration site
- Large construction projects
Doing this creates a permanent storage network across the entire map.
Read More: Once your storage network is in place, it’s the perfect time to start experimenting in the kitchen. Our Pokémon Pokopia Cooking Recipes Guide covers every recipe you can prepare using ingredients stored inside your Portal Pods.
Portal Pod Tips
- Bubbly Basin provides the fastest access to Portal Pods, but they aren’t exclusive to the DLC.
- The first Portal Pod inside the underwater house must be broken with Rock Smash before it can be collected.
- Register your first Portal Pod with the 3D Printer as soon as possible to unlock unlimited copies.
- Store frequently used resources like Pokémetal, wood, stone, and crafting materials inside a Portal Pod to free up inventory space.
- Keep a Portal Pod beside every crafting bench so recipes automatically use stored materials.
- Printing additional Portal Pods costs 5 Rare Pokémetal each, so save this resource for expanding your storage network.
Read Next: Expanding your world isn’t just about resources—many Pokémon require specific environments before they appear. Our Voltorb Habitat Guide for Pokémon Pokopia explains how to create the ideal conditions for this Electric-type Pokémon.
Is It Worth Getting Portal Pods?
Absolutely. Portal Pods are arguably one of the most useful utility items in Pokémon Pokopia, especially once you begin tackling larger habitat restoration projects. Their shared inventory means you can access your resources from almost anywhere, while automatic crafting support eliminates much of the inventory management that slows down building.
If you own the Bubbly Basin DLC, be sure to grab the two free Portal Pods as soon as you can. If not, continue upgrading Palette Town to unlock the crafting recipe, then use the 3D Printer to build a network of Portal Pods across every major region.
Image Credit: The Pokémon Company / Nintendo / Wild Mori (YouTube)


Leave a Reply