
The Bustling Hill quest in Crimson Desert is one of those moments where the game expects you to figure something out that it barely explains. You return to the Howling Hill camp, read a letter from the Dragon Head statue, and then get told to dispatch the Howling Hill Camp Expansion mission. The quest marker points at the camp, but nothing happens when you get there. If you are standing around wondering what to do next, you are not alone. Here is exactly how to get it done and what to expect after.
What Is the Bustling Hill Quest?
The Bustling Hill quest sits inside Chapter 3: Howling Hill, under the Pioneering mission chain. It introduces the Mission Dispatch system, which lets you send Greymane comrades out to complete tasks passively while Kliff handles the main objectives. This is a mandatory main story step, so you need to complete it before moving forward.

The quest has two main objectives:
- Dispatch the Howling Hill Camp Expansion mission by sending Luke and Ronald out.
- Return to the expanded camp after the timer completes to confirm the physical expansion.
Important: Stick to this sequence and complete this mission before attempting any other dispatch missions. A small number of players have reported issues after dispatching other missions first or leaving the area unexpectedly mid-sequence. Following the steps below in order avoids that entirely.

Before You Dispatch: Resource Check
The first expansion mission has a relatively low resource cost — typically a modest amount of Food and supplies — so most players will already have enough by this point in the story. However, if you receive a “not enough resources” or “insufficient supplies” message when trying to dispatch, you need to top up your camp’s supply chest first.
Go to the supply chest inside the main tent, marked by a treasure chest icon, and select Manage Supplies, then Support Camp Resources. Press Y on Xbox or Triangle on PlayStation to donate Silver, Food, or Materials as required. Once the supplies are topped up, you can return to the mission and dispatch without issues.
How to Dispatch the Howling Hill Camp Expansion Mission

The reason this quest trips so many players up is that you do not interact with any NPC or select it from your journal. Instead, you trigger it entirely through the map. Here is the full step-by-step process:
- Make sure you are inside the Howling Hill camp area. If you can see the resource list in the top-right corner of your screen, you are in the right place. You cannot reliably trigger the Inspect command from too far away.
- Open your map and make sure the All tab is selected so all icons are visible.
- Hover your cursor over the Howling Hill camp icon on the map. The icon needs to appear raised or highlighted for the Inspect command to activate. If it does not work straight away, try adjusting your zoom level until the camp icon is properly selected.
- Press the Inspect command — that is Y on Xbox, Triangle on PlayStation, or double-click with the mouse on PC — to open the camp management menu. A short cutscene zooms into the camp and a new screen appears.
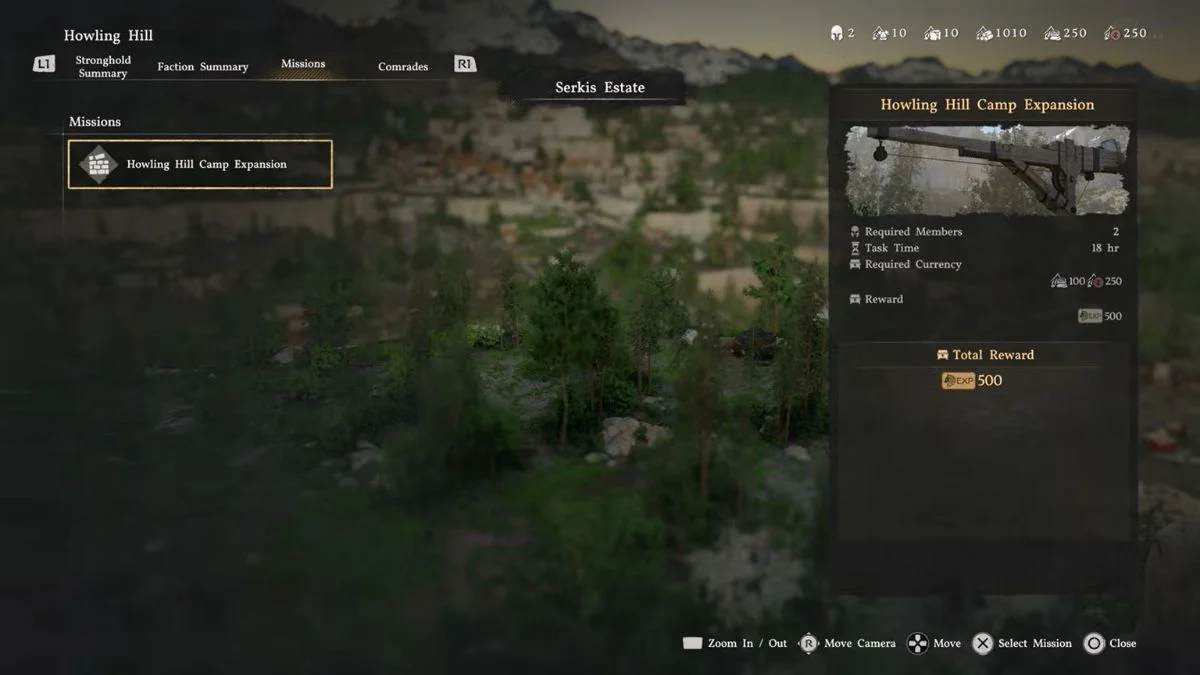
- Switch to the Mission List tab using RB/R1 on controller or by clicking across with the mouse.
- Select the Howling Hill Camp Expansion mission from the list.
- Select both Luke and Ronald at the same time. Highlight one, then highlight the other before pressing the dispatch button. Trying to send them one at a time will not work. Once both are selected, press F on PC, X on Xbox, or Square on PlayStation to dispatch — always follow the on-screen prompt as settings can affect the exact button.
Once dispatched, the camp icon on your map turns yellow to show the mission is in progress.
Comrade Note: Luke and Ronald are fully sufficient for this mission even if not all skill slots are filled. Do not worry if only one proficiency slot lights up — that does not mean they are underqualified. The mission completes normally.
If Inspect does not activate: Close and reopen the map, zoom in or out, or fast-travel away and back to the camp. The prompt can be finicky and this resolves it in most cases.
How Long Does the Mission Take?

The Howling Hill Camp Expansion mission takes 17 in-game hours to complete. You do not have to wait around doing nothing. Here are your options for passing the time:

| Method | Hours Skipped | Notes |
| Sleep in a bed (camp or house) | Up to 12 hours | Fastest single skip, but has a cooldown if you slept recently |
| Wait at a cooking pot or bonfire | Selectable in chunks | Focus-look at the object and select “Wait” to choose a time block |
| Complete side quests | Real time | The most productive use of the waiting period |
Since the maximum you can skip at once is 12 hours, you still need to fill the remaining time with something else. If you cannot sleep because you rested too recently, head to a nearby bonfire and use the Wait option there, or take on one or two quick side quests in the area. Either approach gets you through the remaining time without standing around.
What Happens After the Mission Completes?
Once the 17-hour timer ends, you receive a notification that the mission is complete and your comrades are back. After that:
- You earn 500 Greymane faction experience points.
- The camp physically expands, adding new tents and carts that you can see on your return. This also improves mission efficiency for future dispatches from the same location.
- You may need to re-enter the same camp menu from the map to confirm the physical expansion before the quest registers as complete.
- Return to the camp and talk to Ross, who spawns on the west side of the main road. He is marked by a helmet icon. Talking to Ross is the trigger that unlocks full access to the Mission Dispatch system and advances the main story toward Greymanes Reunited.
There is no additional direct quest reward beyond the 500 EXP and the unlocked dispatch system, but completing this quest opens up one of the game’s most useful ongoing mechanics, so it is well worth doing properly.
How the Mission Dispatch System Works Going Forward
Once Ross unlocks the system, missions become a core part of how you build the Greymanes’ influence across Pywel. Here is what you need to know:
- Missions build faction reputation and reduce enemy presence at encampments.
- Most missions require currency or resources to take on. Donate these to Carl (treasure chest symbol) by selecting Manage Supplies, then Support Camp Resources, then pressing Y or Triangle to contribute.
- Comrades have different proficiencies that suit different mission types. Luke, for example, performs particularly well on construction-focused missions, which can improve the quality of rewards you receive.
- Some missions pay out resources that you can feed directly into other missions. Taking a harvesting mission first and using its food output to fund a guard mission is one way to avoid heavy upfront costs.
- As you complete more Greymane faction quests, you unlock additional Freeswords, which lets you run multiple missions at the same time.
You can access available missions in two ways going forward: by hovering over any location on the map and using the Inspect command, or by talking directly to Ross at the camp for a quicker overview of everything available.

Controls at a Glance
| Action | PC | Xbox | PlayStation |
| Inspect camp on map | Double-click / LMB x2 | Y | Triangle |
| Tab to Mission List | Mouse click | RB | R1 |
| Select Freesword | Left-click | A | X |
| Dispatch Freeswords | F | X | Square |
| Donate supplies (Carl) | — | Y | Triangle |
| Wait at campfire/cooking pot | Focus-look + select Wait | Focus-look + select Wait | Focus-look + select Wait |


Leave a Reply