

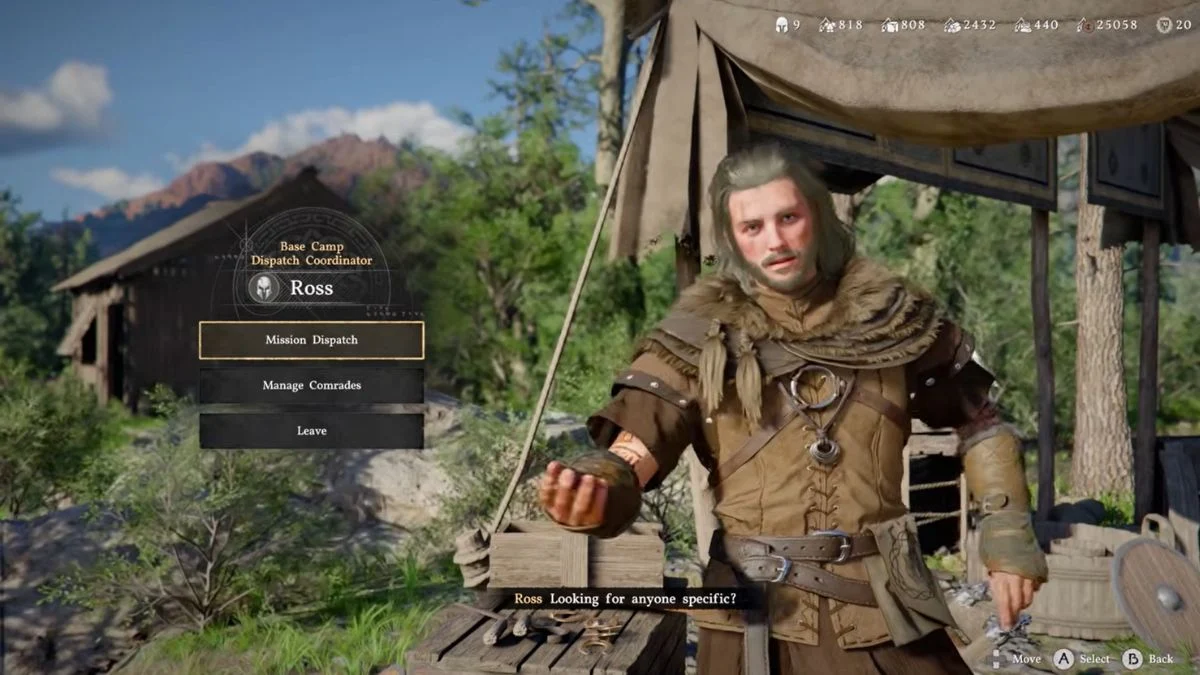
Crimson Desert puts you in charge of rebuilding the Greymane Clan, with your camp at Howling Hill serving as the central hub for everything you do. The upgrade system here is not your standard menu-based affair, and that is exactly where most players get stuck. Instead, it runs entirely through Camp Expansion missions, recruit management, resource donations, and dispatch missions. This guide breaks the whole system down so you can grow your camp without the guesswork.
How to Unlock the Greymane Camp

You establish the Greymane Camp during Chapter 3: Howling Hill — Homestead, shortly after defeating the Hornsplitter boss in Chapter 2. Here is how the sequence plays out:
- You meet Marius, a surviving Greymane, who spreads word of your return.
- Marquis Serkis of House Serkis grants the Greymanes land at Howling Hill.
- You complete the introductory quests “First Step to Rebuilding” and “A Fresh Start”, which involve hauling supplies, setting up tents, and planting the Greymane banner.
- Damiane Spencer becomes a playable character, and Ross and Carl join the camp shortly after.

From there, progress further into Chapter 3: Pioneering — Bustling Hill to unlock the full expansion mission system. A letter from Shakatu, found at the camp shrine, also helps trigger early missions.

How Camp Upgrades Work
Camp upgrades do not happen through a simple button. Instead, you access them through the map, and the steps are as follows:
- Open your map and switch to the Factions tab to make the Howling Hill camp icon visible.
- Hover over the camp icon next to the Greymane emblem and press inspect (or double-click).
- Head to the Missions tab.
- Select the available Howling Hill Camp Expansion mission.
- Assign the required number of Greymane recruits (Freeswords).
- Pay the resource cost using camp provisions managed by Carl.
- Dispatch the mission and either continue playing or sleep at a campfire or bed to skip time. Note that you can only sleep up to 12 hours per rest.
Key tip: Assigning more recruits than the minimum requirement often generates bonus rewards on completion, so overfill whenever you can.
Camp Expansion Requirements
Each expansion tier costs significantly more than the one before it. Here are three verified examples to show how the investment scales:
| Expansion | Recruits Needed | Key Resources Required |
| First Expansion | 2 (e.g. Luke and Ronald) | 100 Food, 250 Money |
| Second Expansion | 4 (at least 1 with Construction skill) | 60 Stone, 60 Lumber, 400 Food, 1,600 Copper |
| Fourth Expansion | 10 | 1,500 Armaments, 2,500 Stone, 2,500 Timber, 4,000 Food, 100,000 Money |
The First Expansion takes approximately 18 in-game hours to complete. The Second Expansion is tied to the Faction Quest called “Expanding the Camp” within the Embers of Return quest chain, and completing it rewards Greymane Contribution points.
Higher expansions require both more resources and further story progress before they become available.
How to Get Resources for Camp Upgrades

You supply the camp by donating items directly to Carl, the Provisions Keeper. Carl converts whatever you hand over into the five resource types that fuel your expansion missions.
| Resource Type | What to Donate |
| Armaments | Weapons, armor, and accessories |
| Stone | Ores and minerals |
| Timber | All types of wood and lumber |
| Food | Cooked meals and crafting ingredients |
| Money | Silver coins, copper, and jewelry |
Once donated, you cannot retrieve those items, so only contribute gear and materials you have no further use for. Weapons and armor you would otherwise sell to a vendor are far more valuable here as camp provisions.

Dispatch Missions — Your Main Resource Engine
Luke handles dispatch missions initially, and Ross later unlocks a dedicated Freesword Management Office that makes mission management much easier to access.
Each Greymane recruit carries unique skills that boost their efficiency on matching mission types. Skills include Farmer, Miner, Logger, Rancher, Smith, Engineer, and Builder, among others. Matching the right recruit to the right mission noticeably improves the resources you bring in.
Here is a breakdown of the main mission types and what they produce:
| Mission Type | Resources Required | Rewards |
| Escort / Security | Food | Money |
| Food Harvest / Ranching | Money | Food, Eggs, Milk, Beef |
| Mining | Food, Money | Stone, Ore |
| Logging | Food, Money | Timber |
| Construction | Stone, Lumber, Food, Money | Camp XP |
| Recapture Stronghold | Armaments, Food, Money | Reduced enemy presence |
| Engineering Production | Armaments, Stone, Lumber, Food, Money | Special items |
Balance warning: Most missions repeat automatically until you cancel them manually. A Security mission earns money, but it continuously costs Food to run. If you do not have a Ranching or Harvest mission running alongside it, your Food supply will drain while you are off exploring. Always pair resource-generating missions together to keep the loop self-sustaining.
How to Get More Recruits
Every expansion tier demands more recruits than the last, so growing your Greymane roster is just as important as stacking resources. You recruit more comrades by:
- Talking to Marius, who sends you on quests to locate scattered Greymanes across the world.
- Completing the Grounds of the Sunrise and Embers of Return Faction Quest chains.
- Advancing the main story, since Chapter 4 and beyond unlock additional recruit quests.
With enough effort, your camp can support over 30 comrades, each contributing their own dispatch skills.
What Unlocks as Your Camp Levels Up
Each successful expansion adds new facilities and features to Howling Hill. Some also tie to specific story milestones:
| Feature | What It Does |
| Farm | Grow crops for cooking ingredients and crafting materials |
| Ranch | Raise livestock for food, fleece, and other materials |
| Wagons | Enable trade routes for passive income (unlocked via Timberturner quests) |
| Hot Air Balloons | Unlock faster aerial travel to remote areas |
| Camp Blacksmith | Refine weapons and armor, buy ammo and refinement items |
| Cooking Bonfire | Prepare combat buff meals directly at the camp |
| Provisioner and Merchants | Buy and sell consumables, gear, and crafting supplies |
Note that the Howling Hill Abyss Nexus fast travel point requires extra steps to unlock. You need to clear vines using your sword’s light ability, along with progress tied to quests like Karin Quarry, so do not expect it to open automatically.
Greymane Commissions — Do Not Ignore These
Rescued Greymanes at your camp post Commission requests asking for specific materials or weapons. Each completed commission rewards a Medium Bag, which adds +3 inventory slots to your character. Completing commissions is one of the best ways to expand your carrying capacity throughout the game. You can also supplement this with Small Bags (purchasable from vendors for +1 slot) and Large Bags (available from other quests for +5 slots).

Best Upgrade Order and Tips
To make your camp grow as efficiently as possible, prioritise in this order:
- Work toward unlocking the Howling Hill Abyss Nexus fast travel point early, since you will return to camp constantly. Remember it requires clearing vines and completing specific quests.
- Trigger and complete the First Expansion as soon as it becomes available to open dispatch missions and additional recruit slots.
- Build the Farm and Ranch early for a sustainable, low-effort food supply.
- Unlock Wagons to generate passive gold income from trade routes.
- Keep dispatch missions running at all times. Letting them sit idle is the single biggest mistake players make, since missions continue producing even while you explore.
- Donate excess weapons and armor to Carl rather than selling them. Stone, Timber, and Food in particular are needed in enormous quantities for later expansions, so resist the urge to offload these at vendors.
- Progress Greymane Faction Quests regularly to unlock new recruit locations and the next expansion tier.


Leave a Reply